Input Field for the WooCommerce Checkout Block
Add a custom input field
to the WooCommerce Checkout Block
directly from the Gutenberg editor.

Simple to use directly from the page editor
Drag and drop
Add the custom input field directly from the Gutenberg editor. No programming is needed.Save the input field value
The value of the input field will be automatically added to the order in the database. The value can be shown on the order page, order confirmation or the order email.Input field types
Several input field types are available:text, select, checkbox, radio, textarea. More to come in the near future.
Input fields validation
The custom input fields can be made optional or required on the frontend.How to use the Input Field block
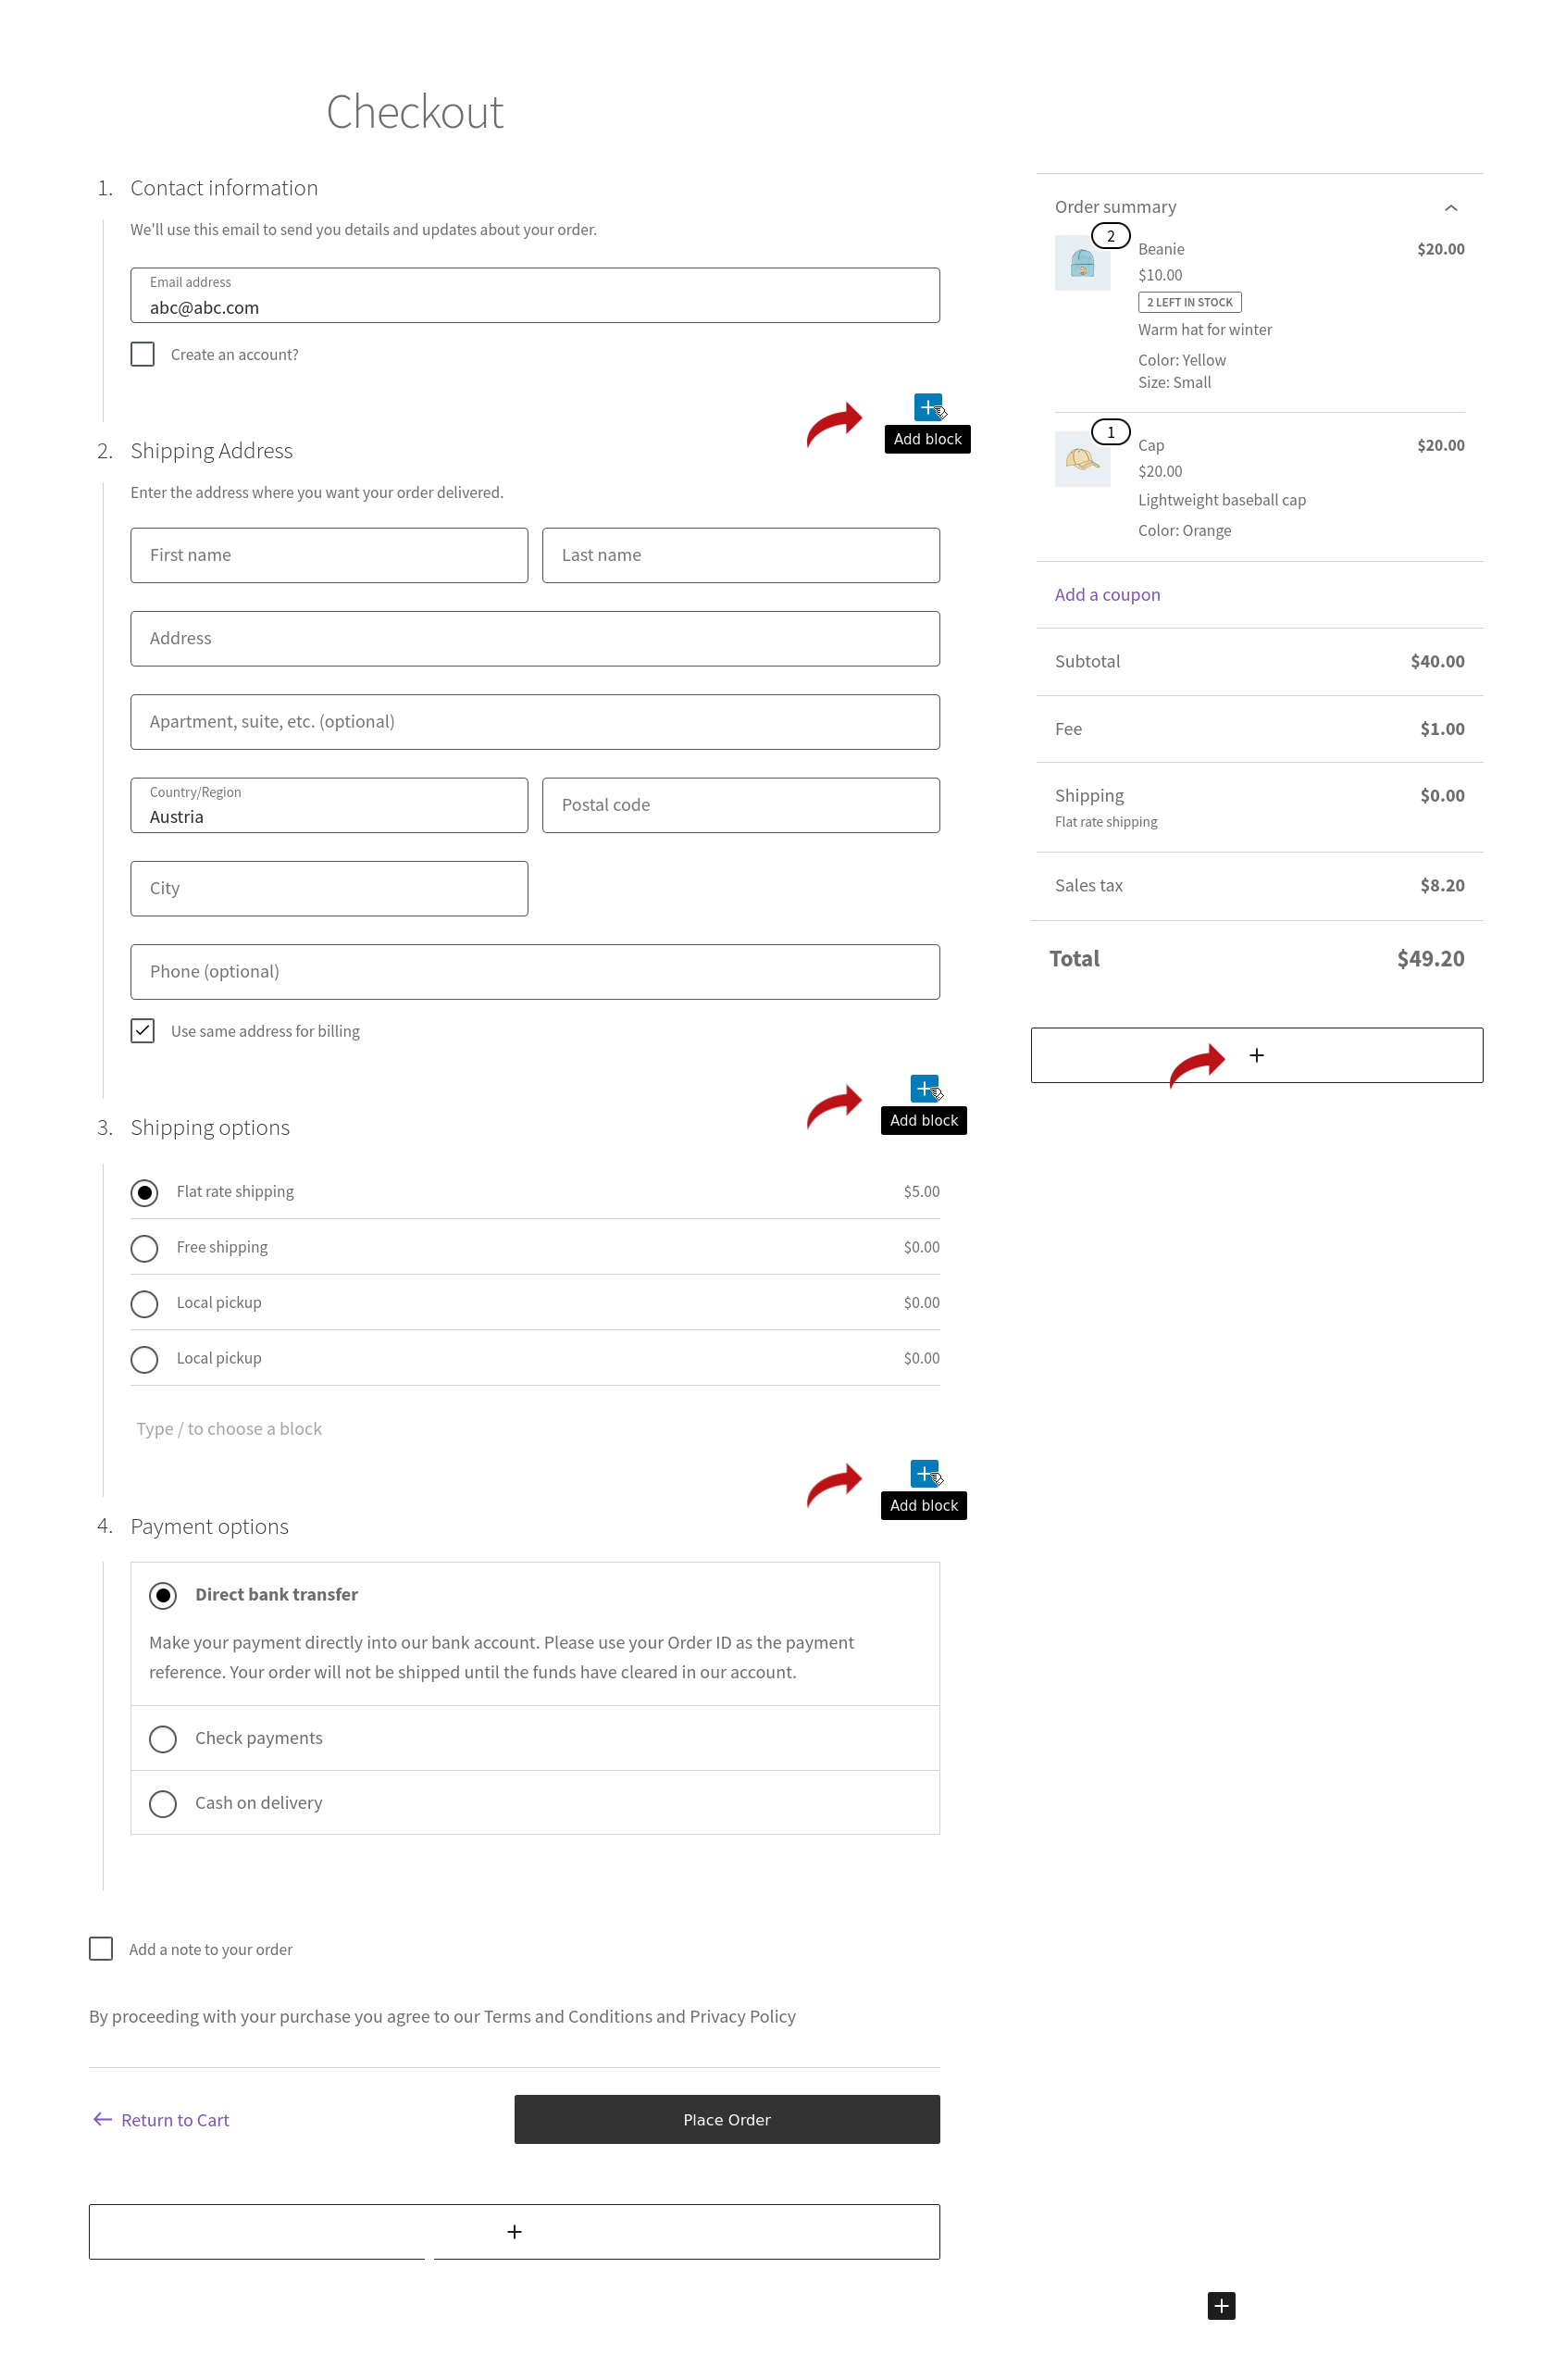
Places to insert the Input Field block
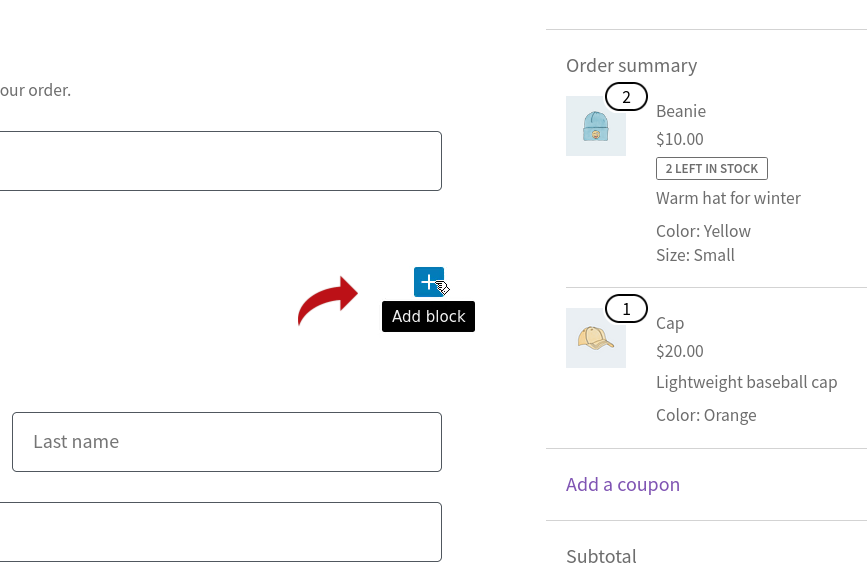

After installing the plugin, you can open the checkout page for editing. The WooCommerce Checkout Block will allow you to add inner blocks only in certain places (for example: after the Contact Information of after the Shipping Address). Click on the left side screenshot to see all the places where you can add an inner block.
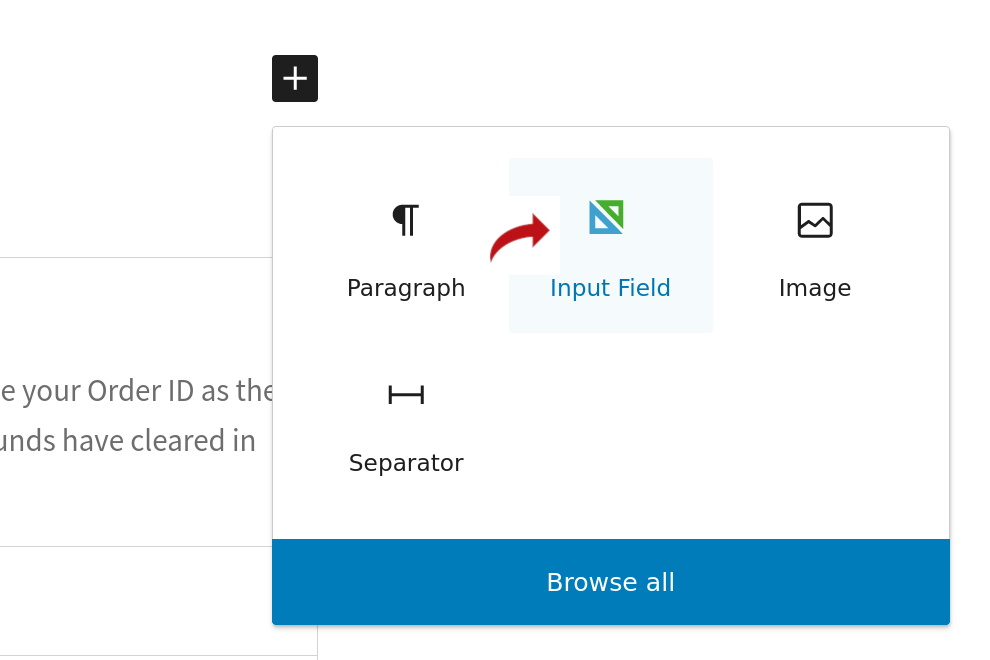
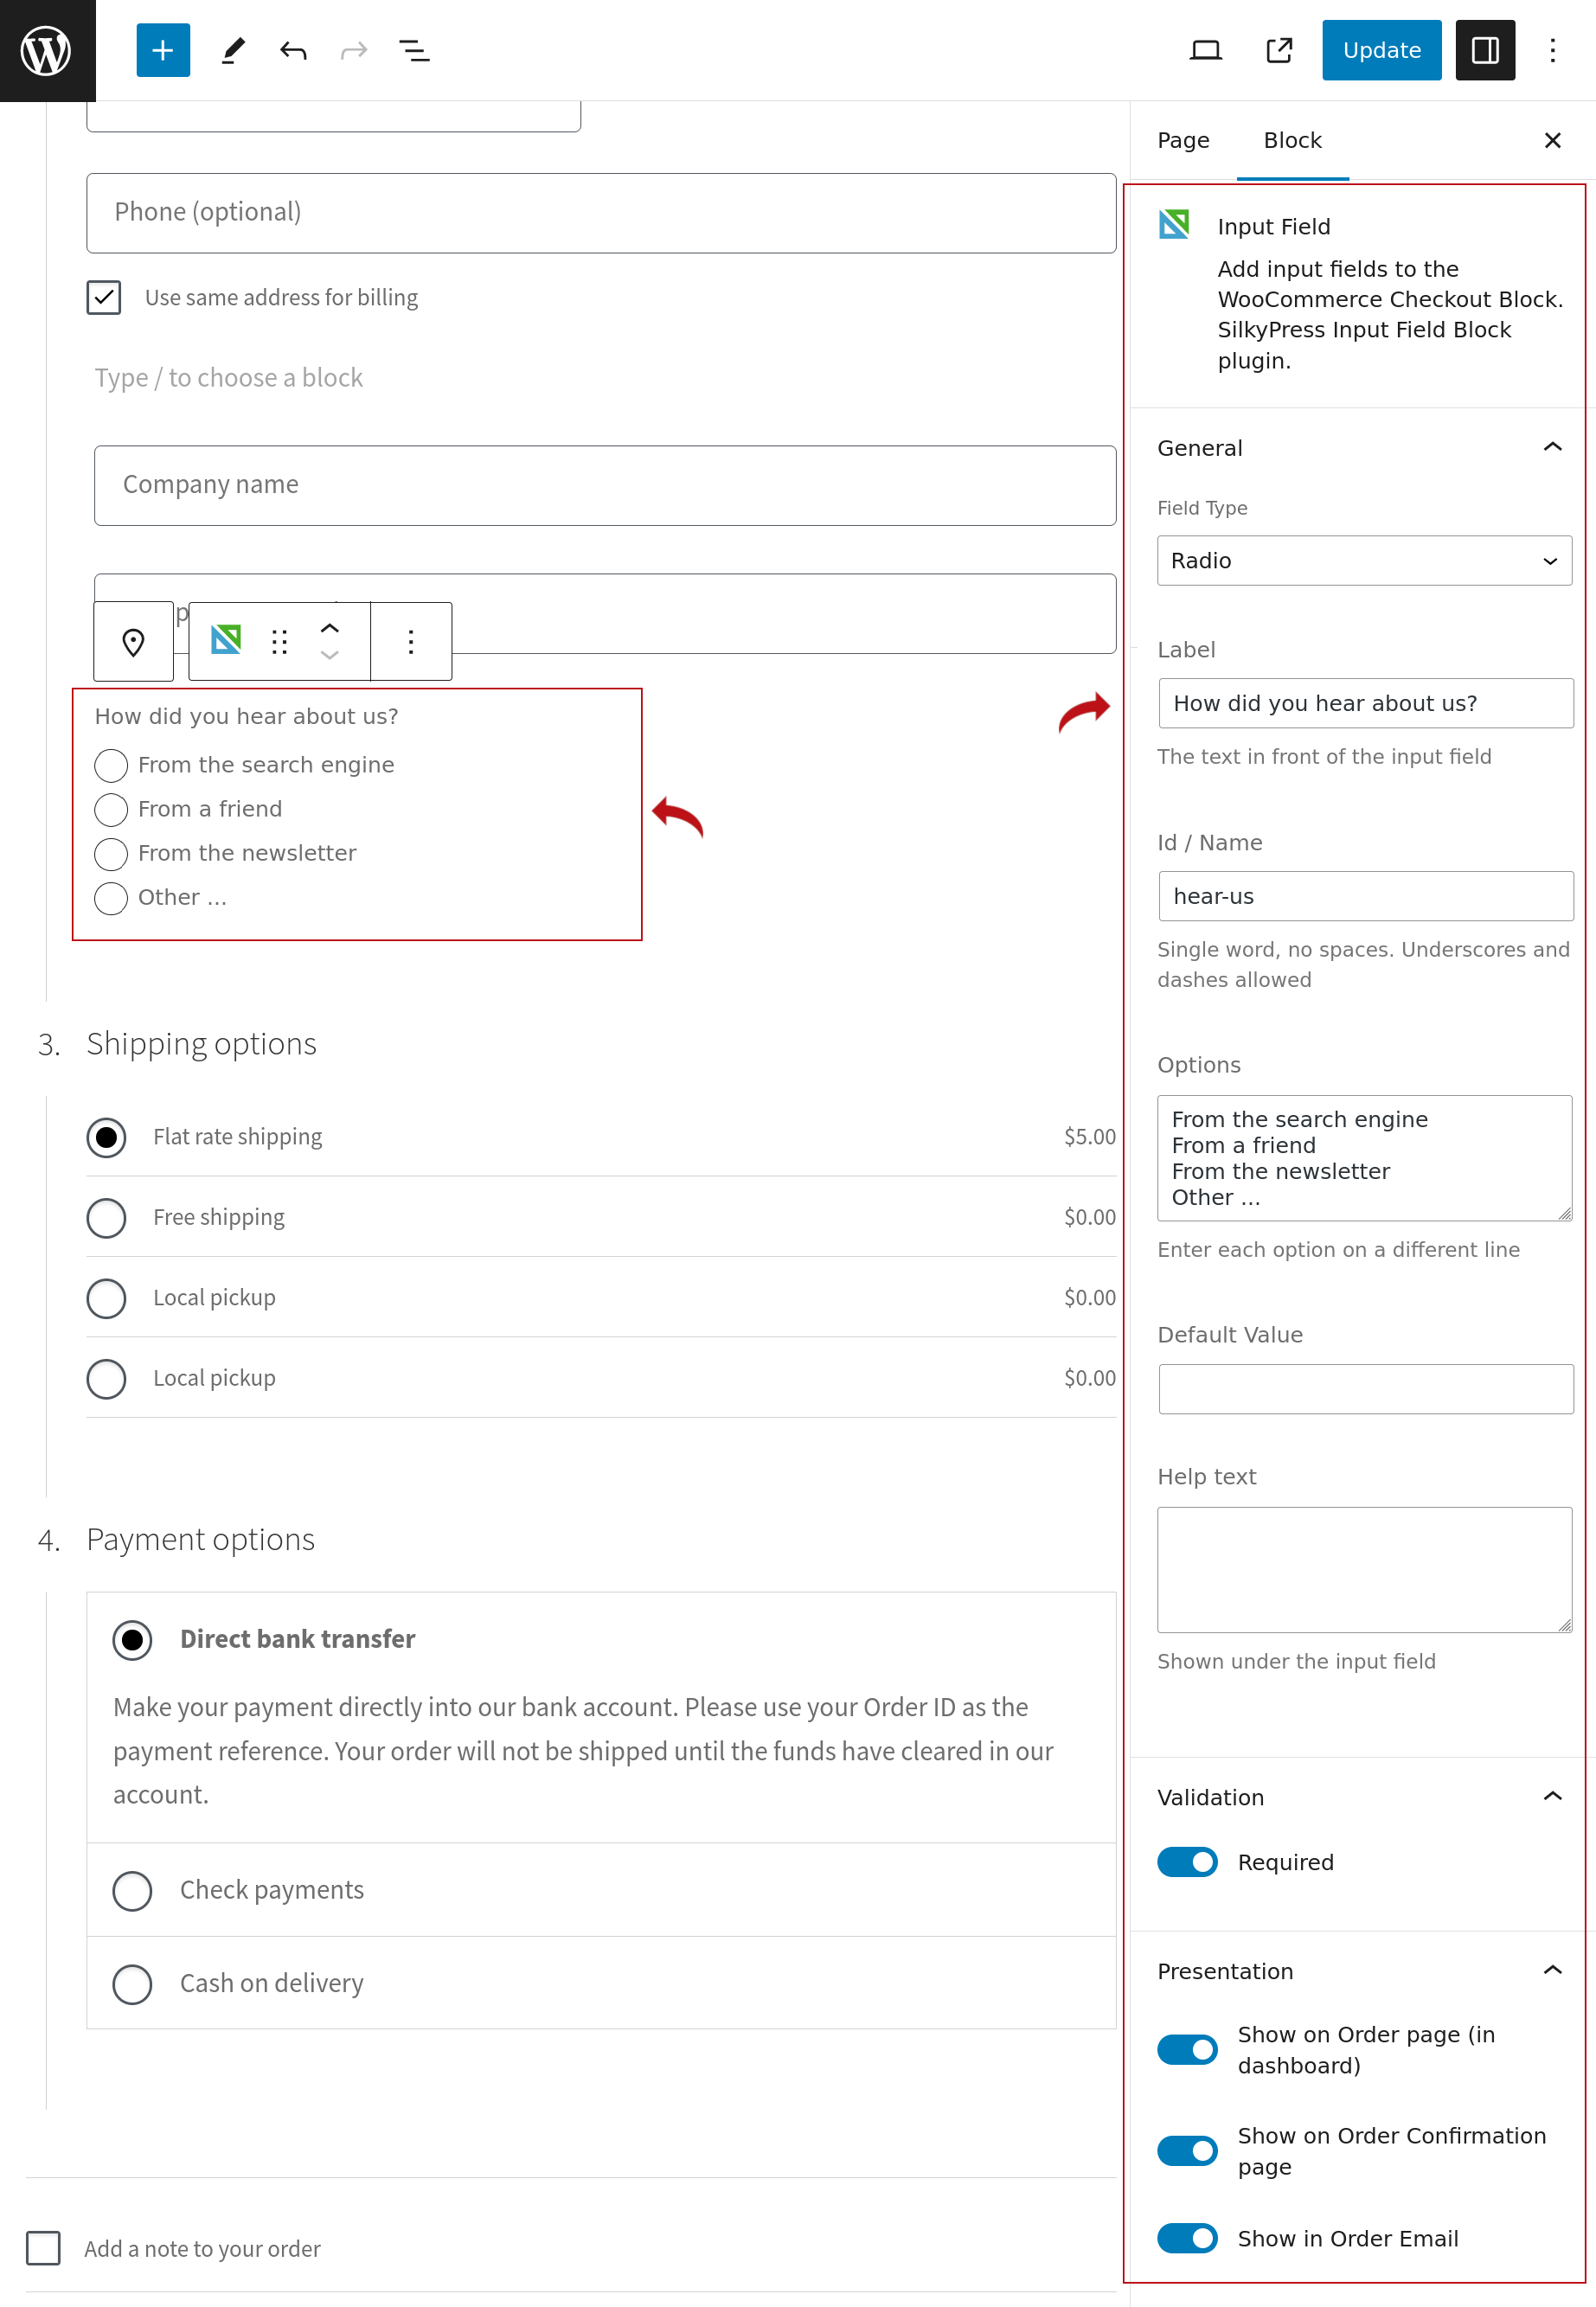
Besides the default Paragraph, Image and Separator blocks, you'll be able to add the Input Field block from SilkyPress. See the right side screenshot.
Input Field block settings
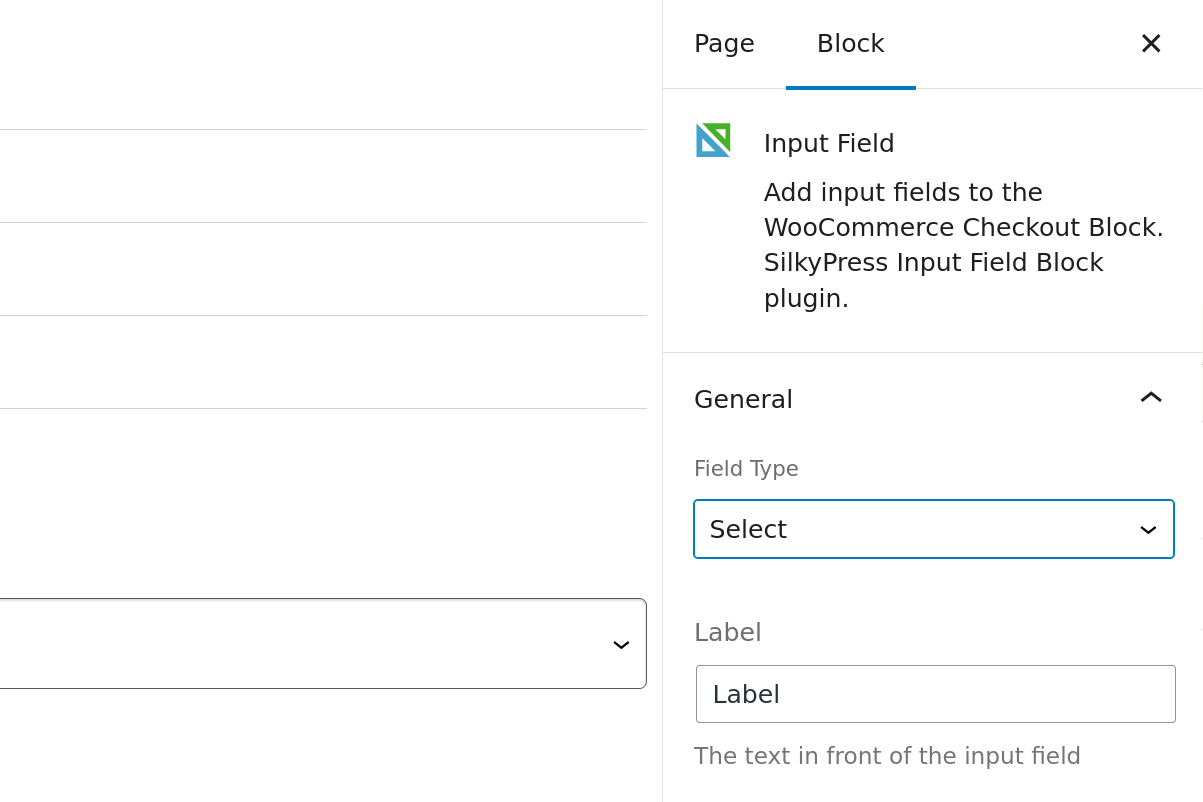
After adding an Input Field, you can change its settings in the Block Inpector on the right side of the editor. Within the settings General tab you can set its field type (Text, Select, Checkbox, Radio or Textarea), label, id, default value, or help text. Additionally, you'll find the Validation and Presentation tab, which will be discussed below.
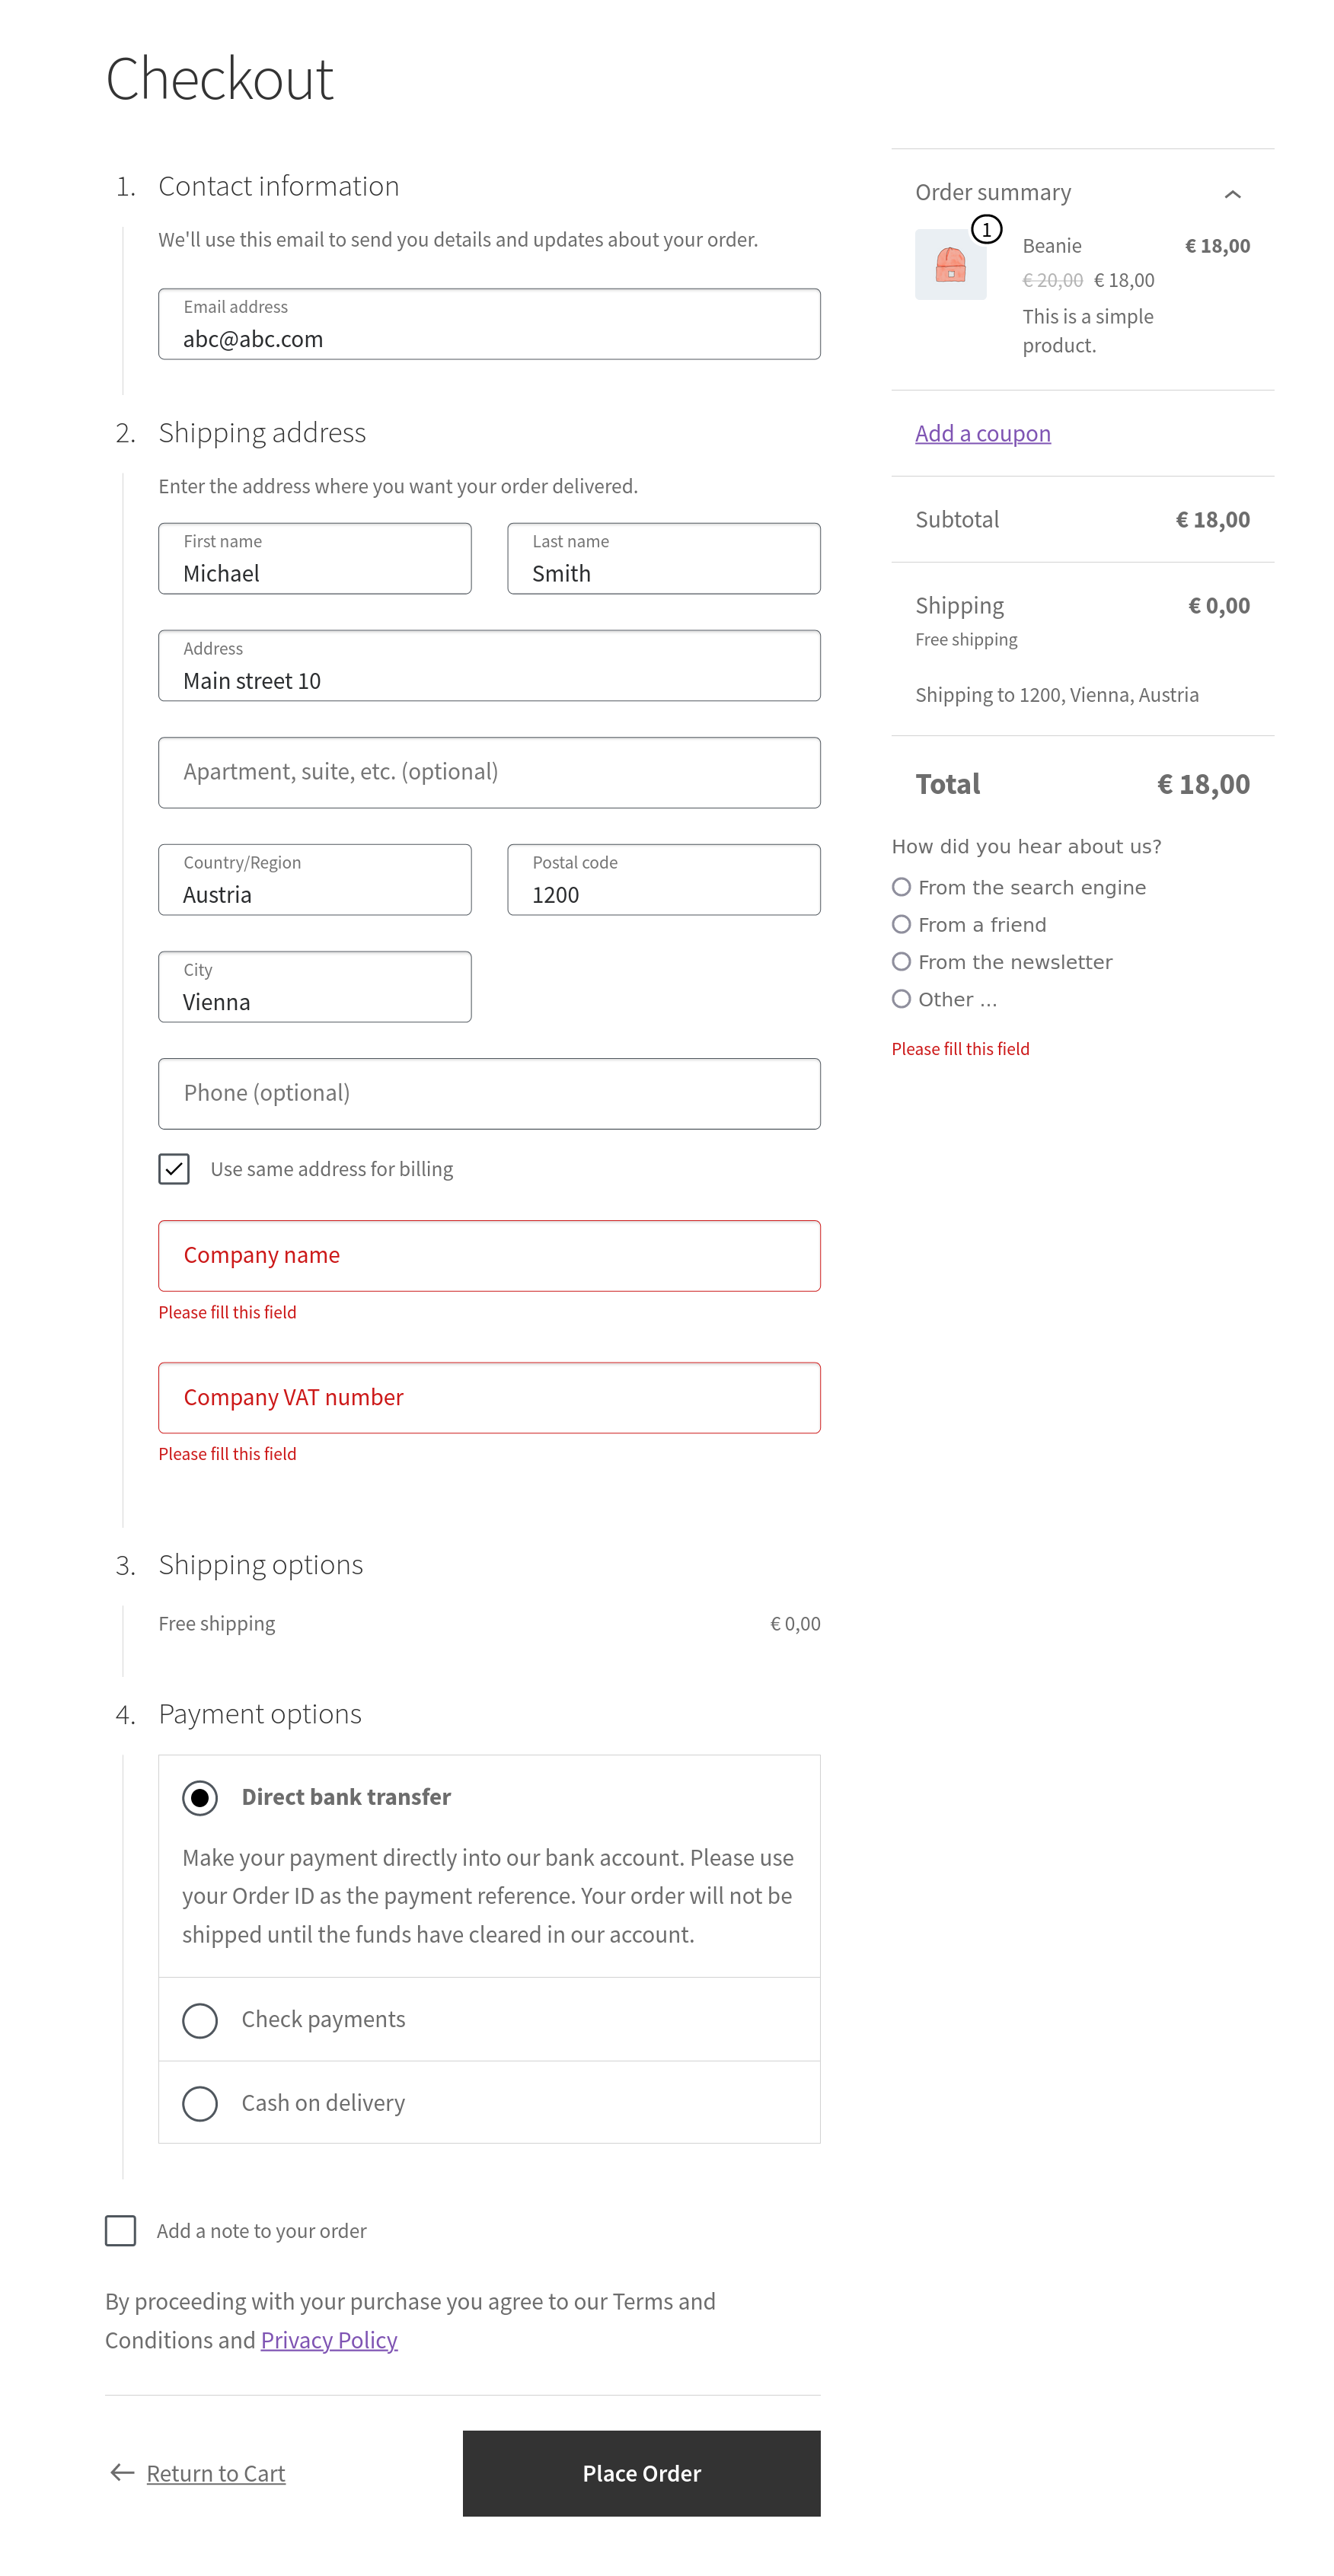
Input Field validation on the Frontend
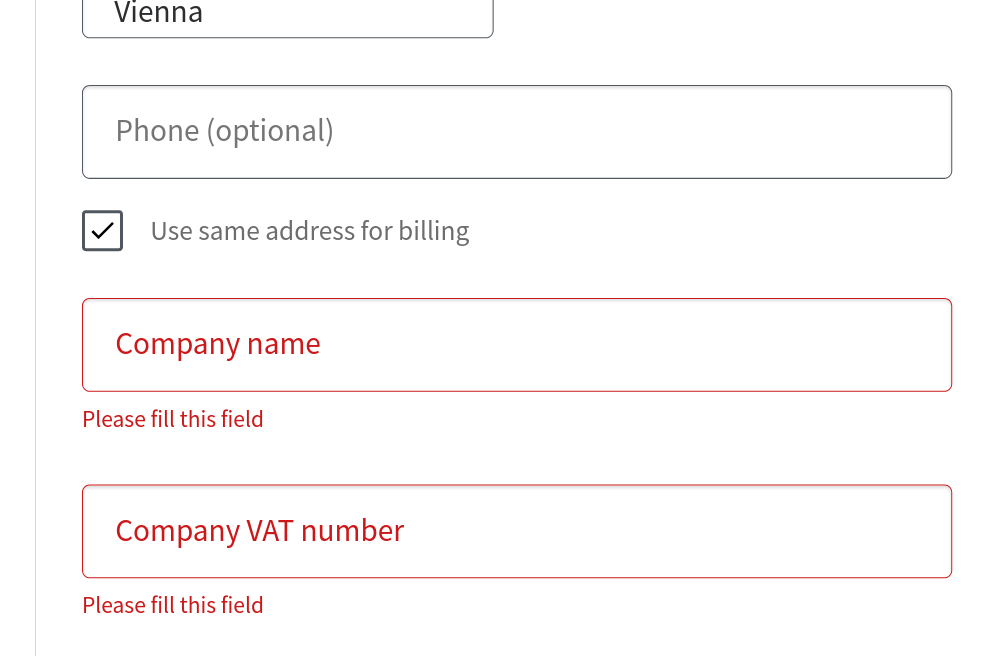
On the frontend the Input Field will show up within the checkout form. If the Input Field was set to be a required field (in the settings Validation tab) and the input field was left empty, then, upon clicking the "Place Order" button, the "Please fill this field" error message will be shown.
Storing the value of the Input Field
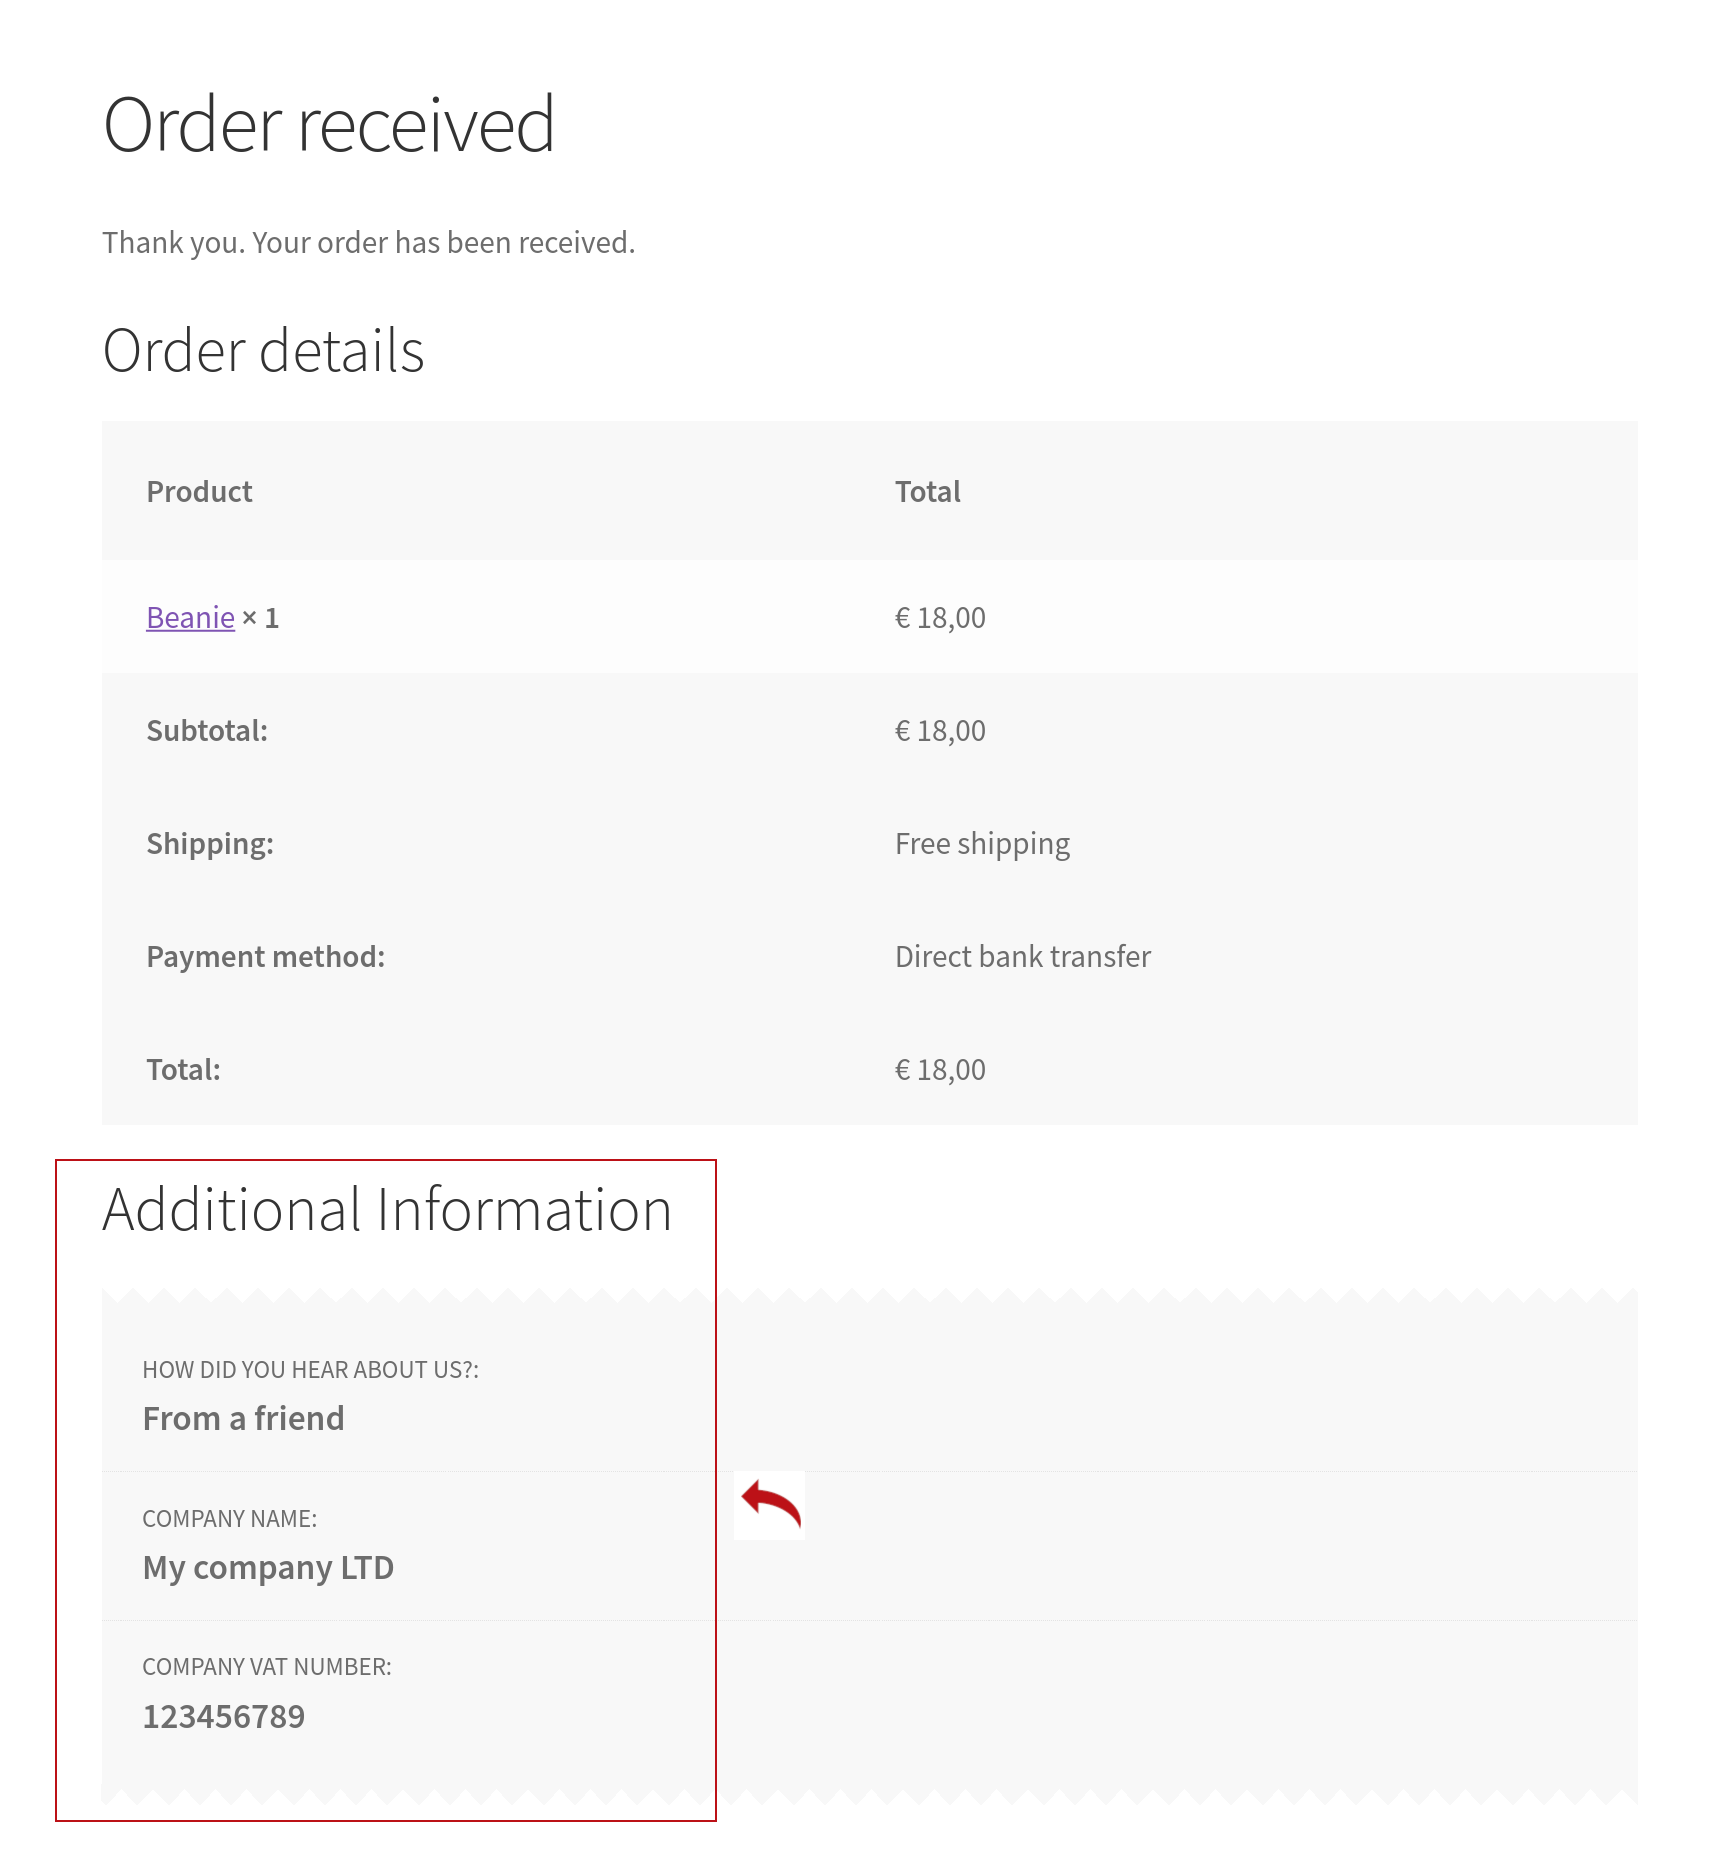
After clicking the "Place Order" button, the value of the Input Field will be saved to the database as a custom field associated with the order.
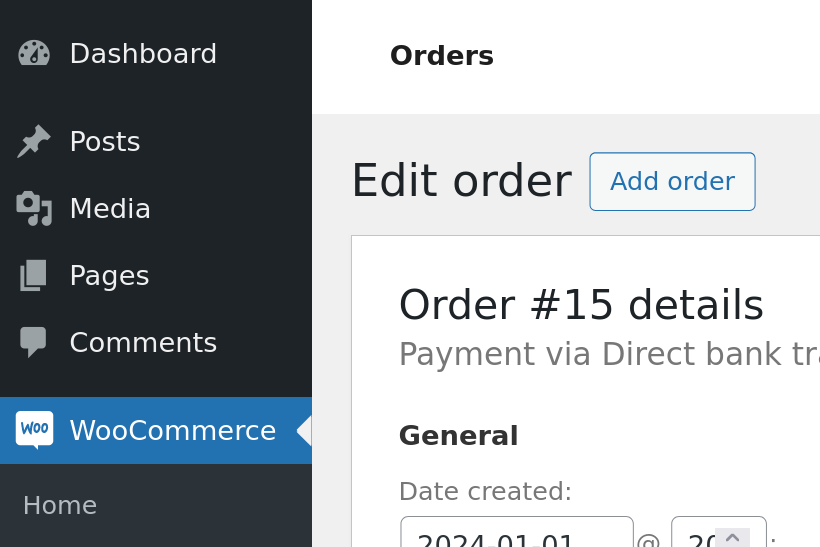
If the "Show on Order page" option is enabled within the Input Field block settings in the Presentation tab, then the field's value will also be shown on the "Edit Order" page under the Shipping section.
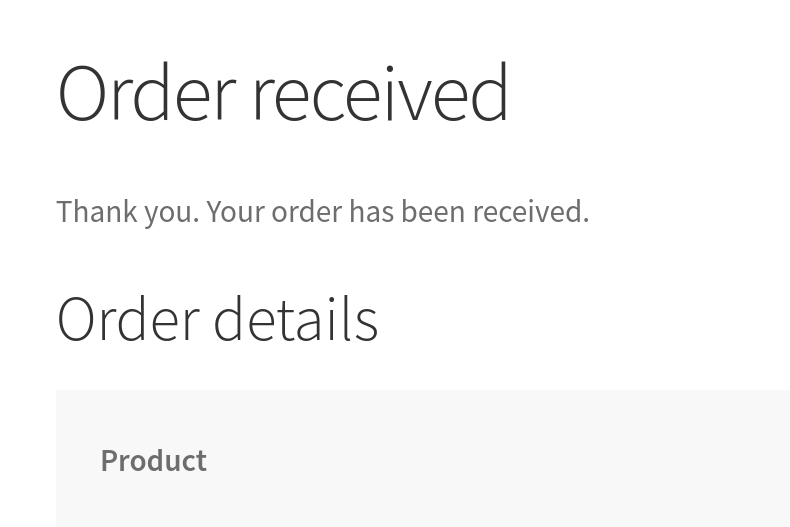
If the "Show on Order Confirmation page" option is enabled within the Presentation tab, then the field's value will also be shown on the Order Confirmation page (formally known as Thank You page), which is shown to the shop's customer immediatelly after clicking the "Place Order" button.
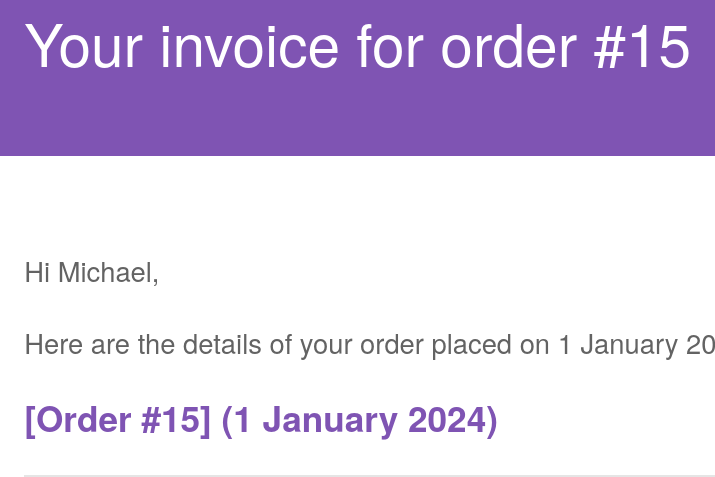
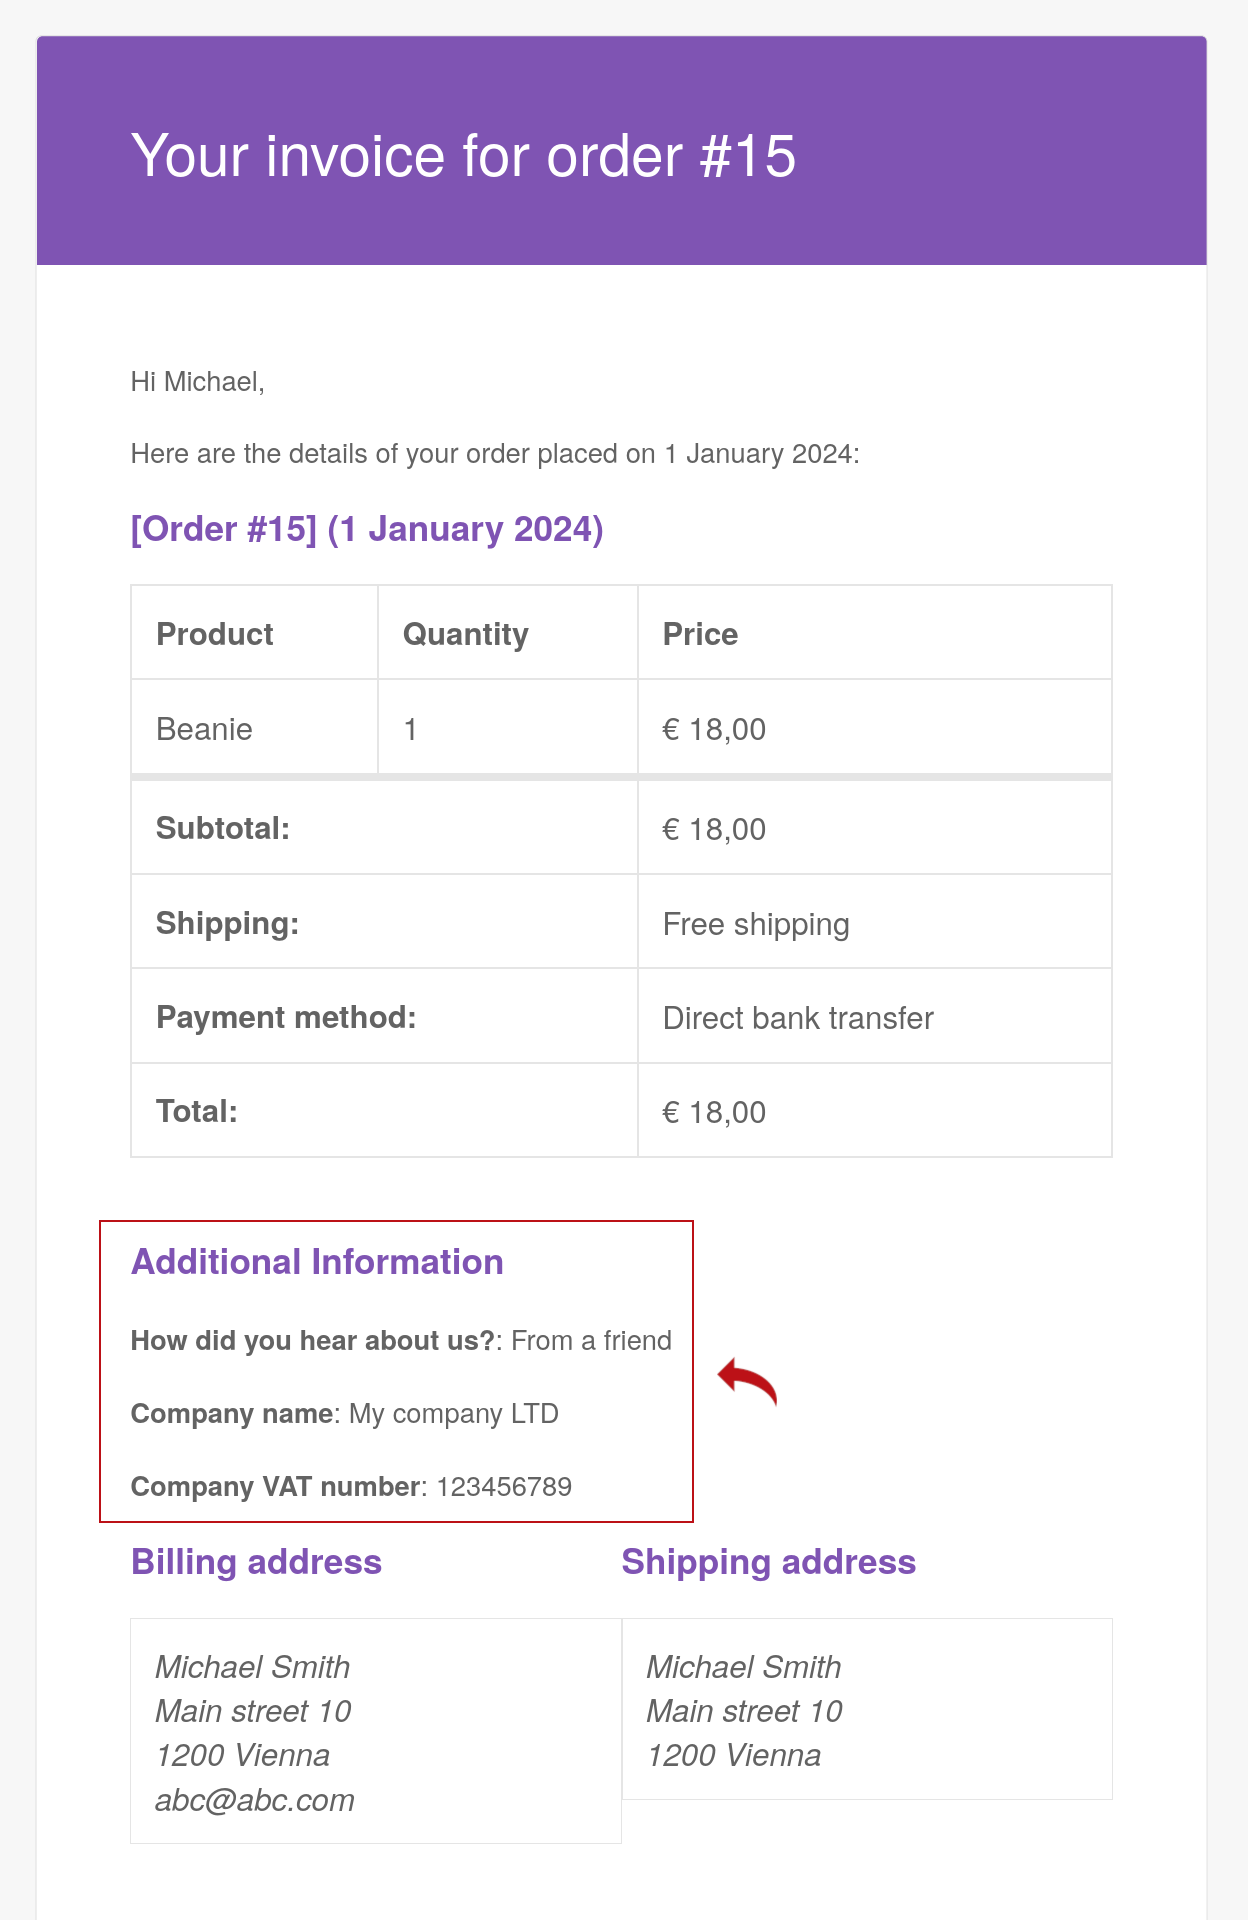
If the "Show in Order Email" option is enabled within the Presentation tab, then the field's value will also be shown in the email the customer receives after placing the order.
Compatibility
WooCommerce: 7.6.0 or higher (alternatively, the WooCommerce Blocks plugin 9.8.0 or higher)
WordPress: 6.0 or higher
PHP version: 7.3 or higher