WP Image Zoom Pro – Documentation
Installation and Updates
- Download the .zip file from the email you received.
- Go to: WordPress Admin > Plugins > Add New to upload the file you downloaded with Choose File.
- Activate the plugin.
More information at: Installing and Managing Plugins.
If you already have the free version of the plugin installed on your website, the PRO version will automatically overtake the configurations from the free version and will disable the free version plugin during the activation. You can choose to keep the disabled free version on your website or you can delete it.
In order to receive unlock all the plugin’s functionality and receive the updates, don’t forget to activate your license, as shown below.
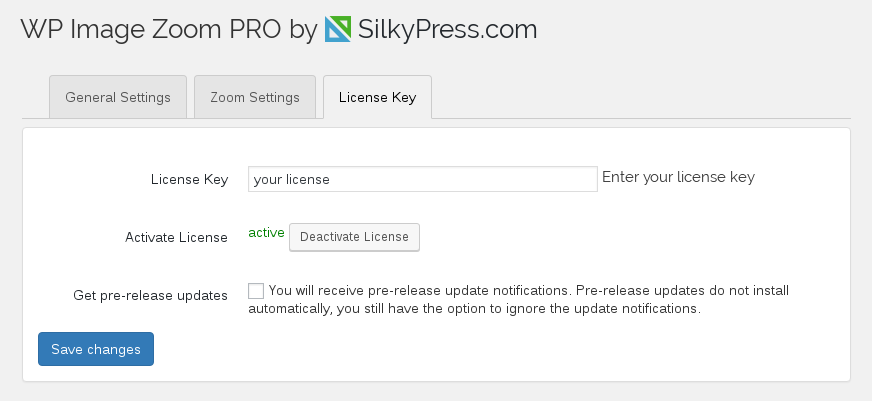
For updates you’ll be notified in the WorPress Admin -> Plugins page and by clicking update now you will receive the latest version.
Settings Configuration
In the Zoom Settings tab, under the Step 1, you’ll be able to define the zoom type: with No Lens, Circle Lens, Square Lens or With Zoom Window.
In the Step 2 you can check live the zoom type on the demo image. Any further changes to the zoom configurations will be immediately be visible on this demo image.
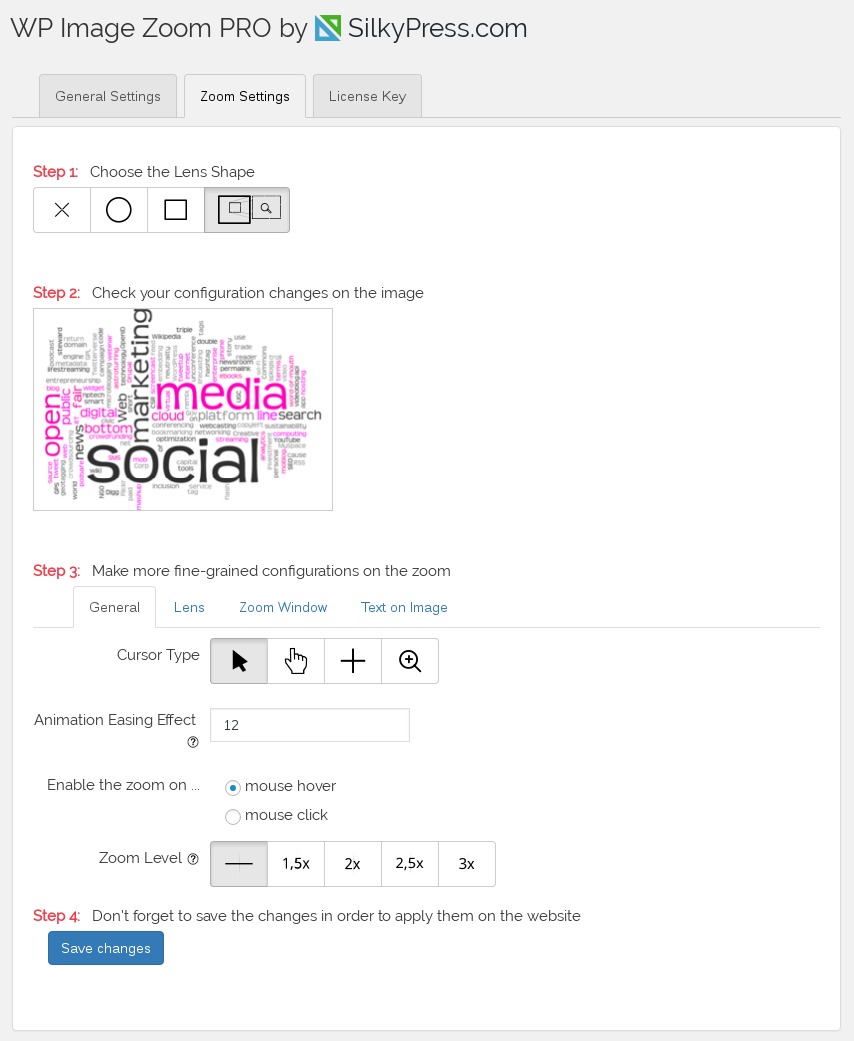
Afterwards you can fine-grain the configuration of the zoom in the Step 3.
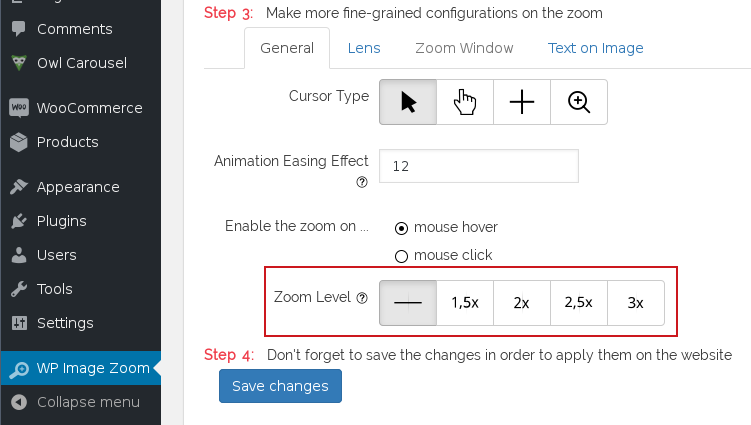
Under the General tab you’ll find configuration options that can be applied to all four types of zoom:
Cursor Type– the cursor that will be displayed when hovering over a zoomed image.Animation Easing Effect– speed at which the zoom animation progresses. Allowed values: 0-200. 0 for no animation effect, 200 for very slow animation effect. Default: 12.Enable the zoom on ...– the event which will trigger the zoom. In case you have big images and the page scrolling is hindered by the zoom on hover, you can change to “zoom on mouse click”.Zoom Level. By default the zoom level will be automatically calculated from the real size of the image versus the presented size. This should suffice most use cases. You can also choose to force the zoom level at 1,5x / 2x / 2,5x / 3x times the size of the presented image.
» The Lens
Next you can configure your lens. The Lens tab will be disabled if you chose the “No Lens” zoom type.
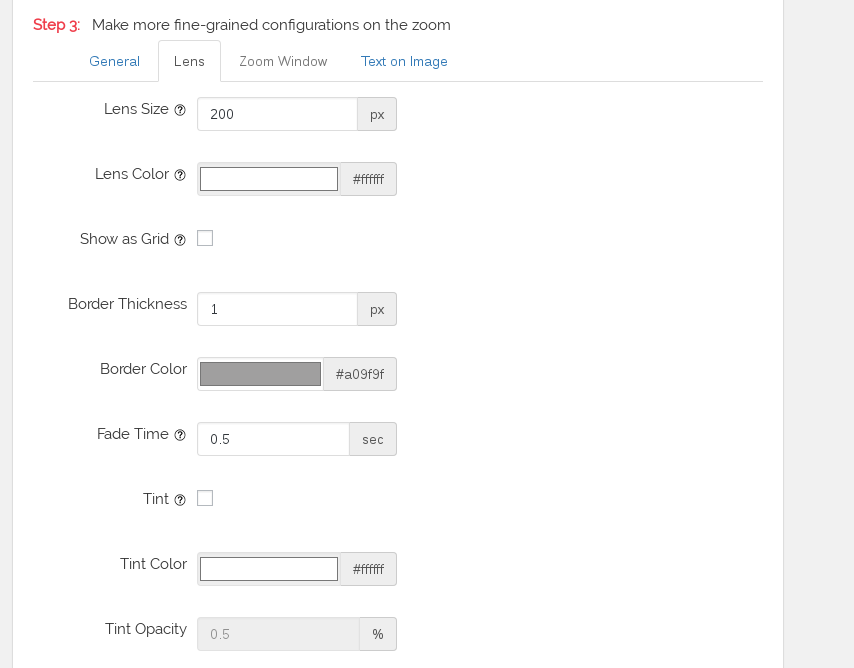
Lens Size– means the diameter of the circle if you chose the Circle Lens and the width and height of the square in case you chose the Square Lens.Lens Color– is available only if you chose the With Zoom Window zoom type. Will change the color of the lens.Border Thickness. You are not limited to any values, but it’s best to keep the value between 0px and 10px.Border Color– changes the color of the border.Fade Time– will fade in and fade out the lens in this amount of time. You are not limited to integers, so, for example, you can write 0.5 for “half a second”.Tint– you can choose to lay a color over the part of the image left uncovered by the lens.Tint Color– the color of the tint (see above for a definition for Tint).Tint Opacity– the opacity of the tint (see above for a definition for Tint).
» The Zoom Window
The Zoom Window tab will be active only if you chose the “With Zoom Window” zoom type.
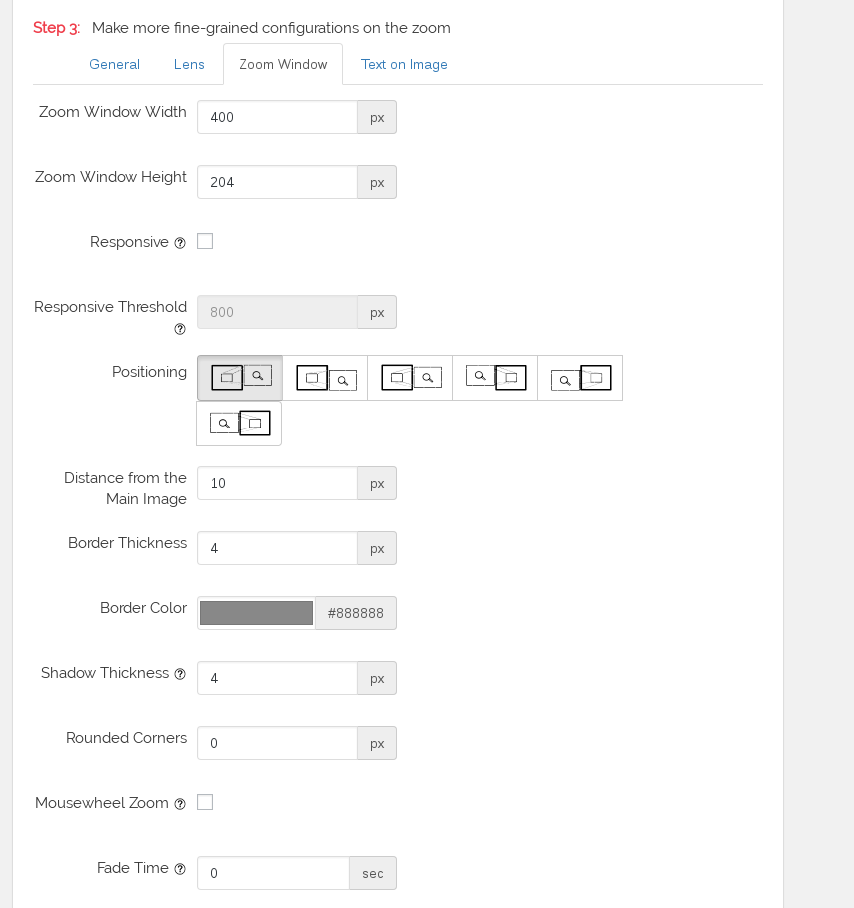
Zoom Window Width– the width of the Zoom Window. The width and height of the Lens will be calculated automatically in order to display the relation between the Lens and the Zoom Window.Zoom Window Height– the height of the Zoom Window.Responsive– the Zoom Window will adapt to the browser size. For example, if you set the Zoom Window Width to 600px, but the amount of space where the Zoom Window should show up is smaller than 600px, then the Zoom Window will shrink in order to fit into the amount of space available.Responsive Threshold– the zoom type will automatically switch from With Zoom Window to No Lens (or inner zoom) once the browser is smaller than this threshold. For example, if the Responsive Threshold is set to 800px, then there will be a Zoom Window displayed on desktop browsers and No Lens zoom for browsers with width less than 800px.Positioning– choose the positioning of the Zoom Window in relationship to the zoomed image. Available options are: Right Top, Right Bottom, Right Center, Left Top, Right Bottom, Right Center. The default option is Right Top.Distance from the Main Image– the distance between the Zoom Window and the zoomed image. Default is 10px.Border Thickness– the thickness of the border.Border Color– the color of the border.Shadow Thickness– the thickness of the shadow. Use 0 in order to remove the shadow. There are no limitations to the values, but it is advisable to keep it in the 0-10 range.Mousewheel Zoom– your website’s user will be able to increase or decrease the zoom level with the mouse wheel.Fade Time– will fade in and fade out the Zoom Window in this amount of time. You are not limited to integers, so, for example, you can write 0.5 for “half a second”.
» General Settings

Add zoom to static images in bulk. This is an advanced option and requires you to know what an CSS Selector is. In this option you can write the CSS classes and ids of images or sections of the page where you want the zoom to be applied. For example, if you want to apply the zoom on all the images that have the “gallery-image” class, then you need to write.gallery-image(note the dot in front for indicating a CSS class selector). Another example, if you want to apply the zoom on all the images on the page with the 1234 id, then you need to write.page-id-3089. You can add multiple classes and ids by separating them with comma, just like any CSS selector.Enable inside lightboxes– will add the zoom on an image that is opened by a lightbox.Enable the zoom on mobile devicesWith WooCommerce: Enable on product images– will add the zoom on the images inside the WooCommerce gallery. If this option is enabled and it is still not working on your website, please check out the Troubleshooting section.With WooCommerce: Exchange the thumbnail with main image– will slightly modify the default behavior of the default WooCommerce product gallery, so that, when clicking on the thumbnail, the thumbnail image will be switched to the previously main image.With WooCommerce: enable on category pages– will add the zoom on the product images on the WooCommerce category pages.With WooCommerce: Enable on images for variation products. the WooCommerce variation products will normally replace the entire product gallery every time another variation is chosen. Enable this option if there are variation products in your WooCommerce shop.With WooCommerce: Remove the lightbox– will remove the Lightbox both on the main image and on the thumbnail images on WooCommerce galleries. Check above for a definition for Lightbox.With WooCommerce: Remove the lightbox on thumbnail images. On the default WooCommerce gallery, when you click on the product’s images there comes up a popup (called Lightbox) where you can browse the images. If you want to remove this behavior on the thumbnail images and leave only the zoom, please enable this option.With SureCart: Enable on product images– will apply the zoom on the images inside the SureCart product galleries.FlexSlider container. Check the How to apply the zoom on sliders section for more details.OwlCarousel container. Check the How to apply the zoom on sliders section for more details.Flickity Carousel container. Check the How to apply the zoom on sliders section for more details.Swiper slider containerSlick carousel containerHuge IT Gallery id. This option will enable you to apply the zoom on the Huge IT Gallery. You can add multiple gallery CSS ids separated with comma.
How to apply the zoom
» On page/post image(s)
The easiest way to apply the zoom is by selecting the image and clicking on the “WP Image Zoom” button in the editor, as shown in the following screenshot:
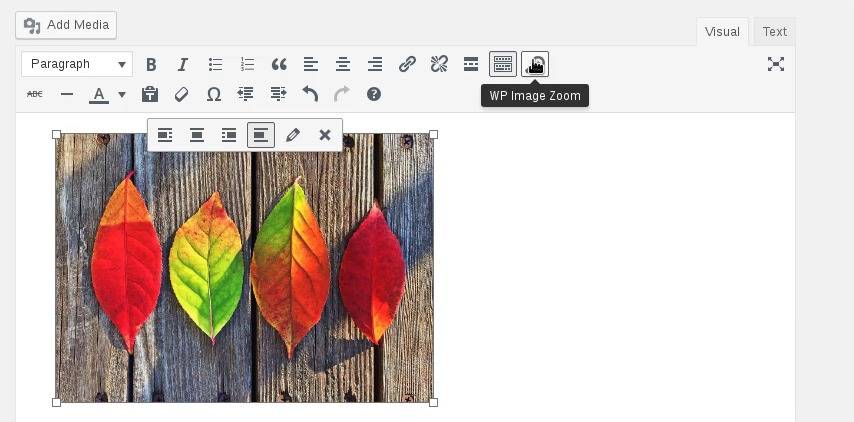
In case the button doesn’t show up, please check the Troubleshooting section for details.
In case the default WordPress editor is hidden because you’re using a page builder, please check the How to apply the zoom from Page Builders section.
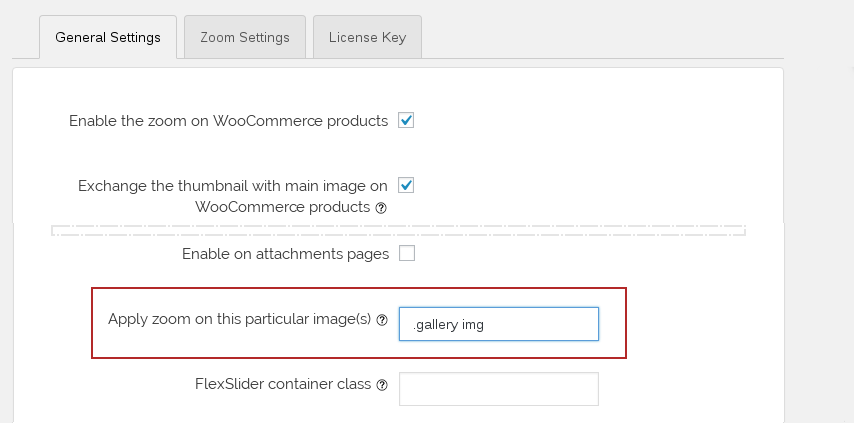
If you want to apply the zoom on all the images in a page, you can check the “Apply zoom on this particular image(s)” option in the General Settings section in the admin.
» On WooCommerce products
The zoom is by default enabled on the WooCommerce products. You can choose to add the zoom to the WooCommerce category pages, or you can remove the zoom from the WooCommerce products in the General Settings section in the admin.
If the zoom is not working on your WooCommerce products, please check out the Troubleshooting section.
» On sliders
Currently the plugin is compatibile with the FlexSlider, Owl Carousel, Flickity Carousel, Swiper Slider, Slick Carousel and the Huge IT Gallery sliders.
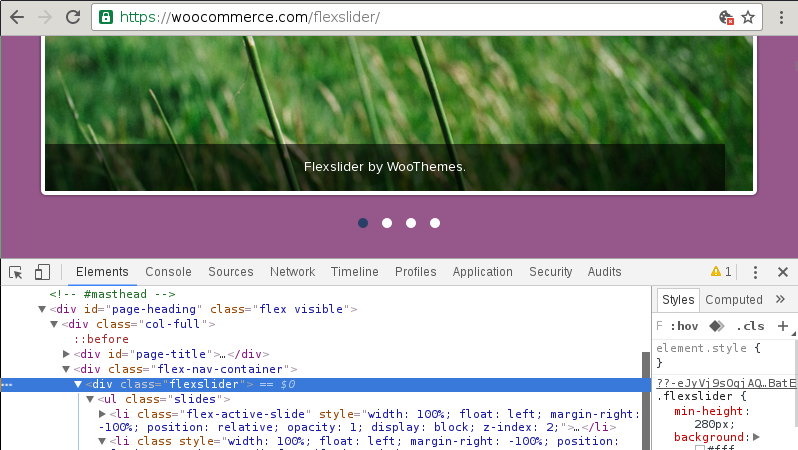
For any of these carousels and sliders you need to specify the CSS class of a container div and write it down in the appropriate option on the General Settings page. For example, for applying the zoom on a FlexSlider carousel, please open the browser’s Options Inspector and find a container div’s CSS class. In the following screenshot the container div’s CSS class is called flexslider:
How to apply the zoom from Page Builders
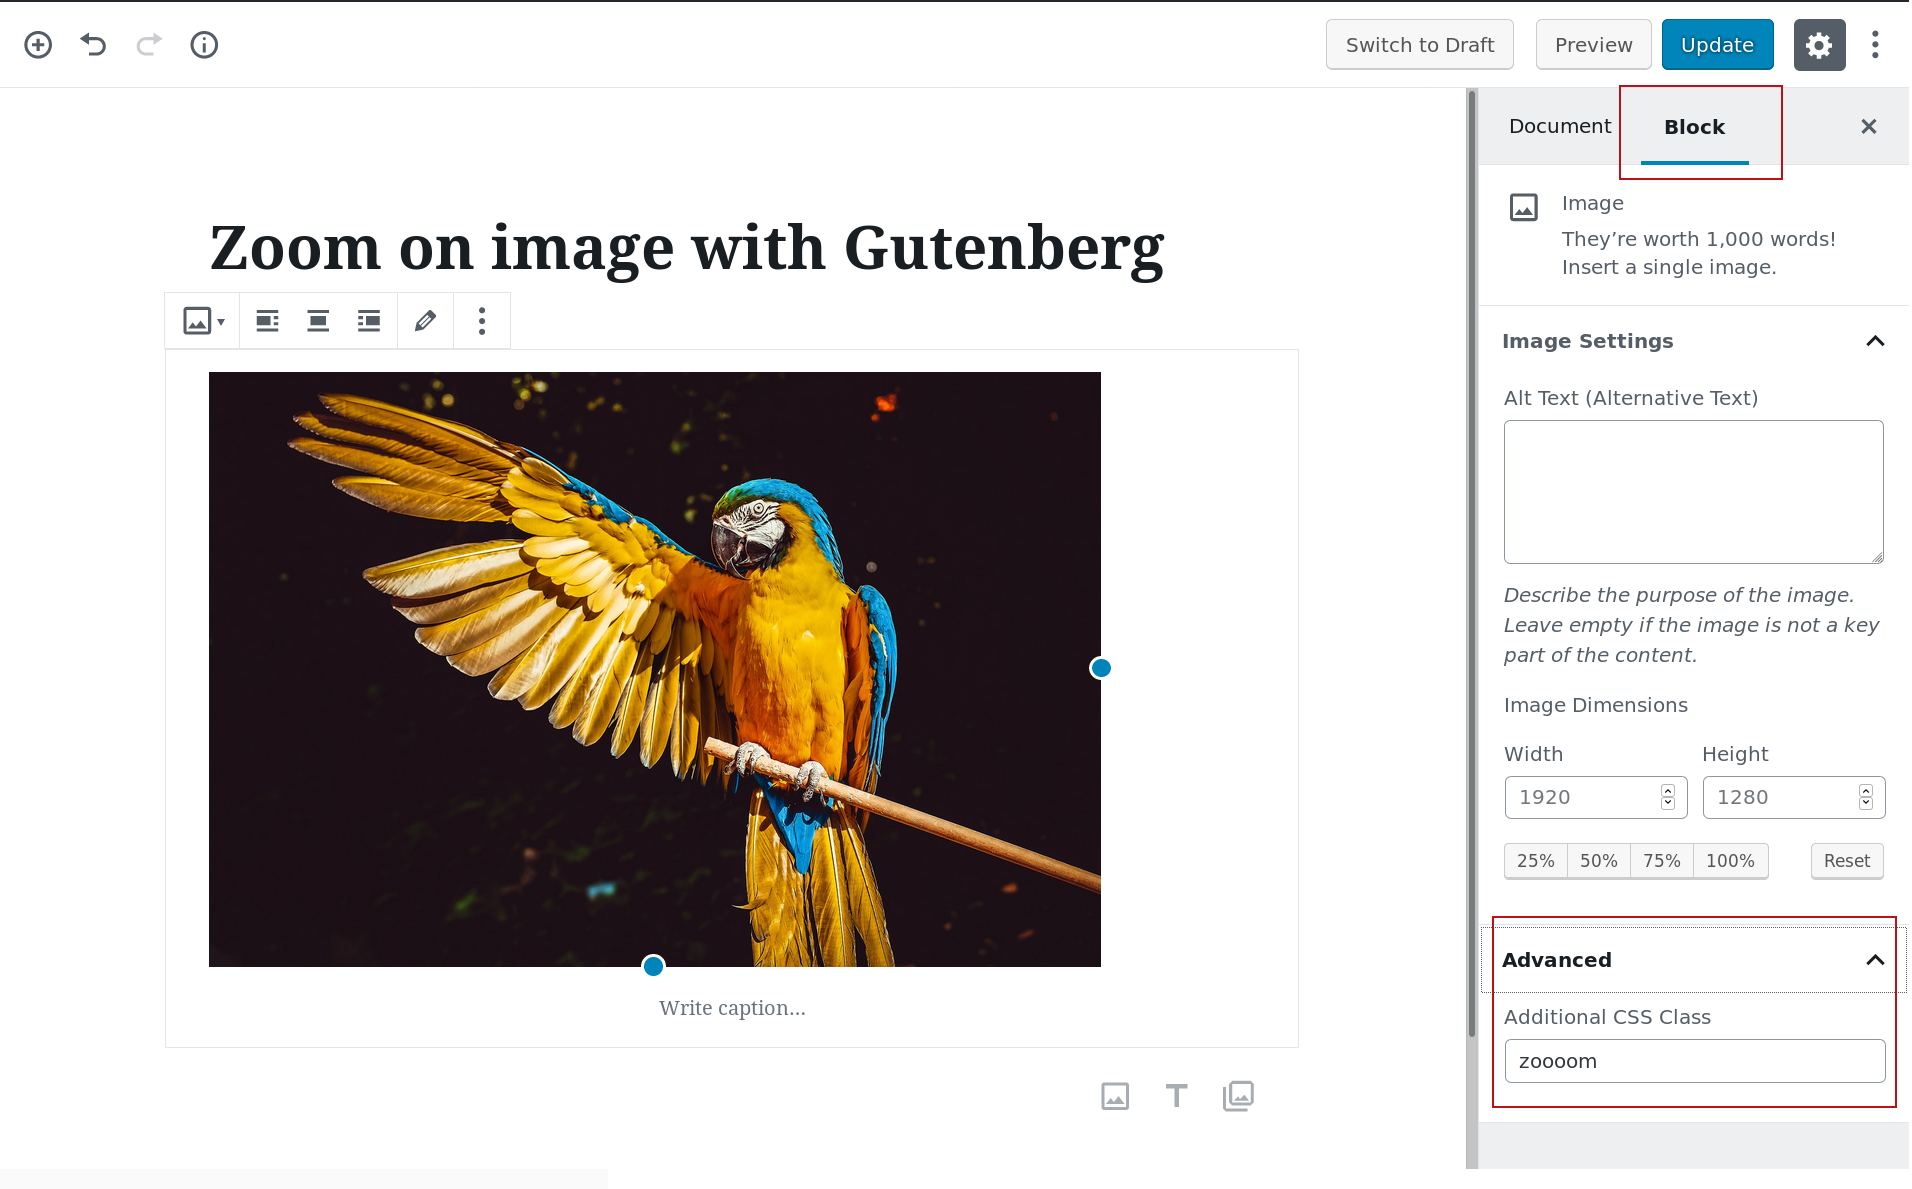
» Apply the zoom with Gutenberg
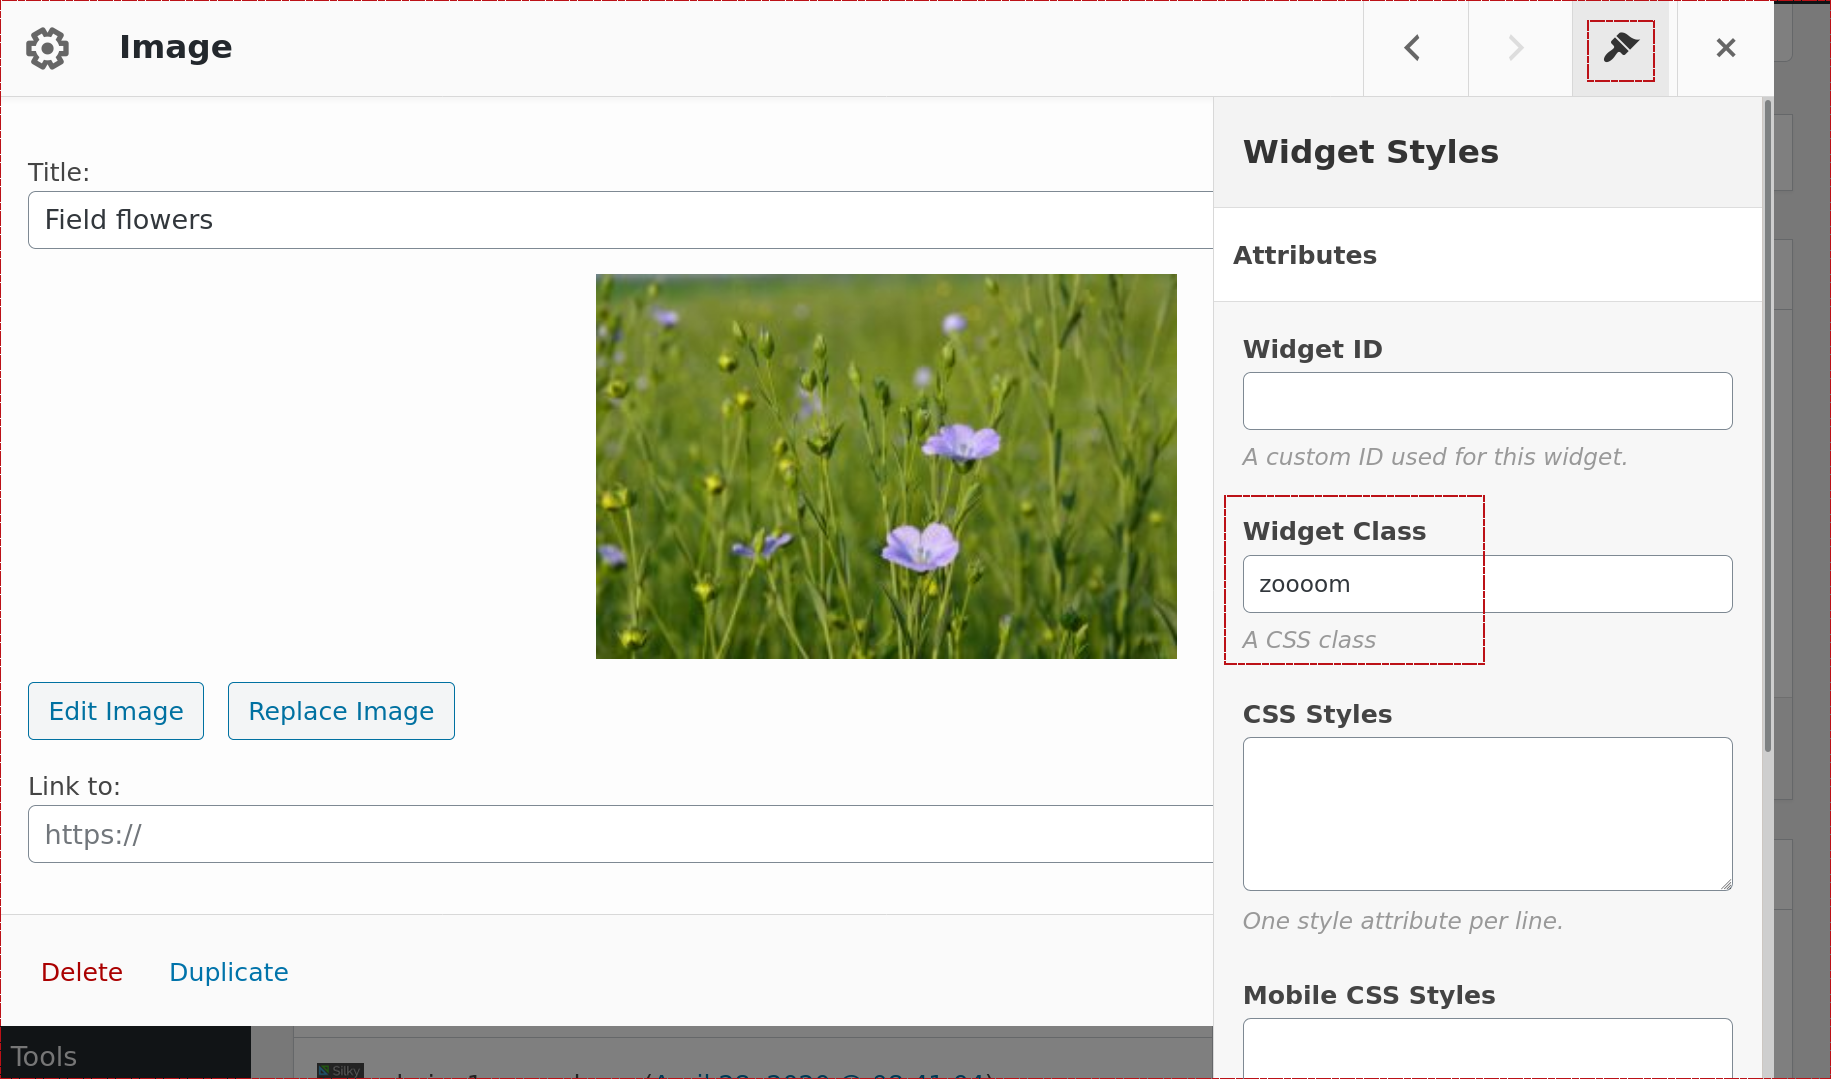
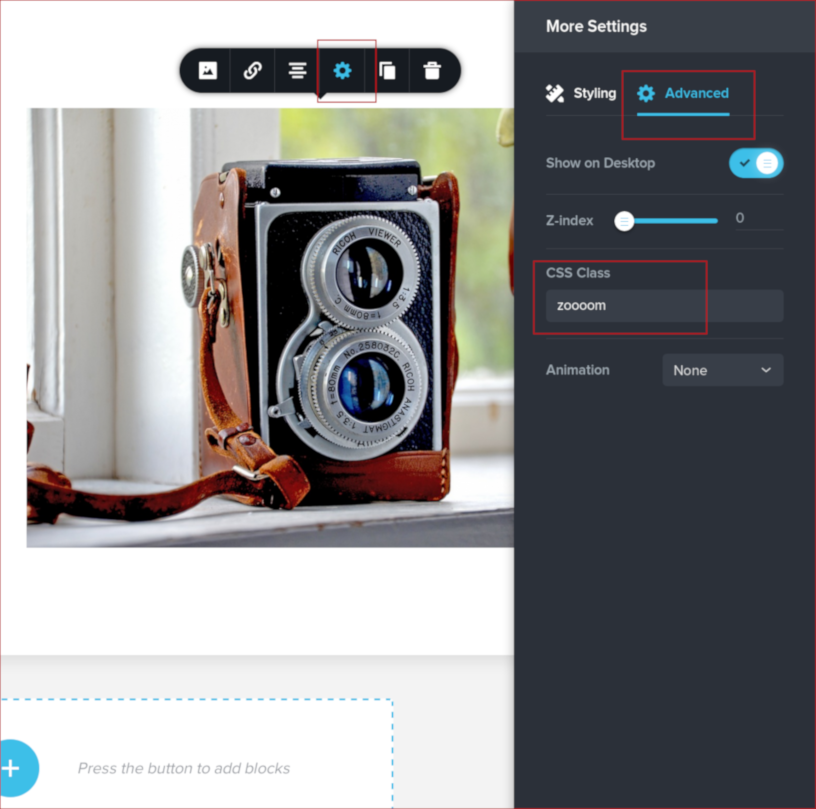
To apply the zoom you need to tag the image with the zoooom CSS class as shown in the following screenshot:
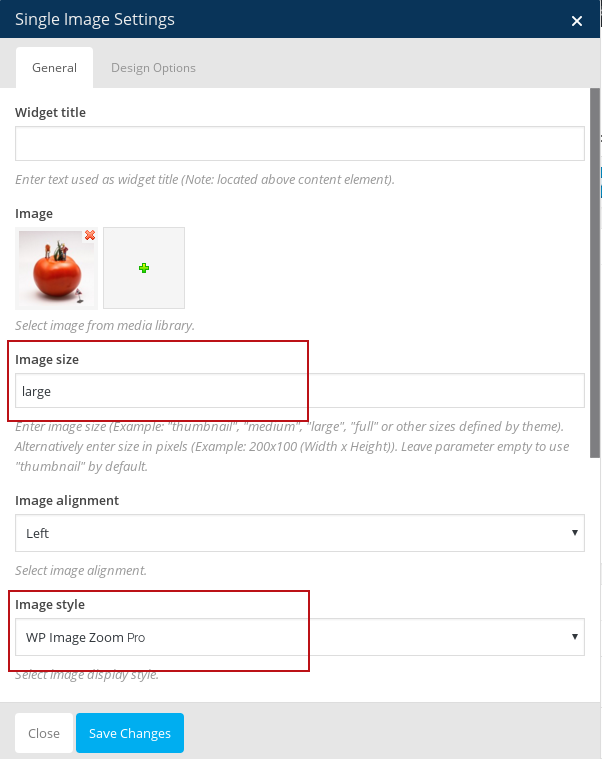
» Apply the zoom with WPBakery (former Visual Composer)
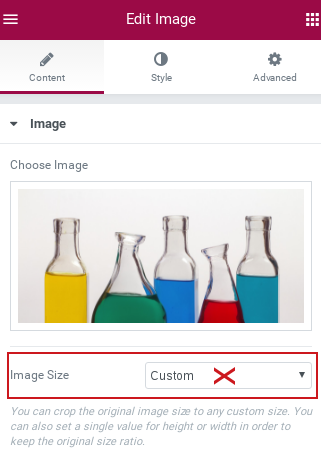
The WP Image Zoom PRO plugin has a built in compatibility with WPBakery. Just make sure you set large or full for the Image Size and select the WP Image Zoom Pro from the Image Style dropdown, as shown in the following screenshot:
Note: some themes remove entirely the Single Image element from WPBakery. If this is the case, you can still apply the zoom by adding the zoooom class to the Extra class name setting in the Column Settings in the WPBakery. If this sounds confusing, please watch this video for detailed explanations.
» Apply the zoom with Page Builder by SiteOrigin
To apply the zoom on specific images you have to tag the image with the zoooom CSS class as shown in the following screenshot:
» Apply the zoom with Elementor Page Builder
To apply the zoom you need to tag the image with the zoooom CSS class as shown in the following screenshot:
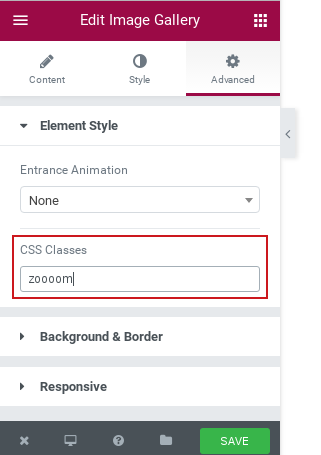
Note that the Elementor builder automatically creates a smaller version of the image once the Custom size is set. As an effect, the zoom will be blurry. You can use the any of the other sizes (Large, Medium Large, Full…), but not the Custom size, as shown in the above screenshot.
» Apply the zoom with the Beaver Builder
To apply the zoom you need to tag the image with the zoooom CSS class as shown in the following screenshot:
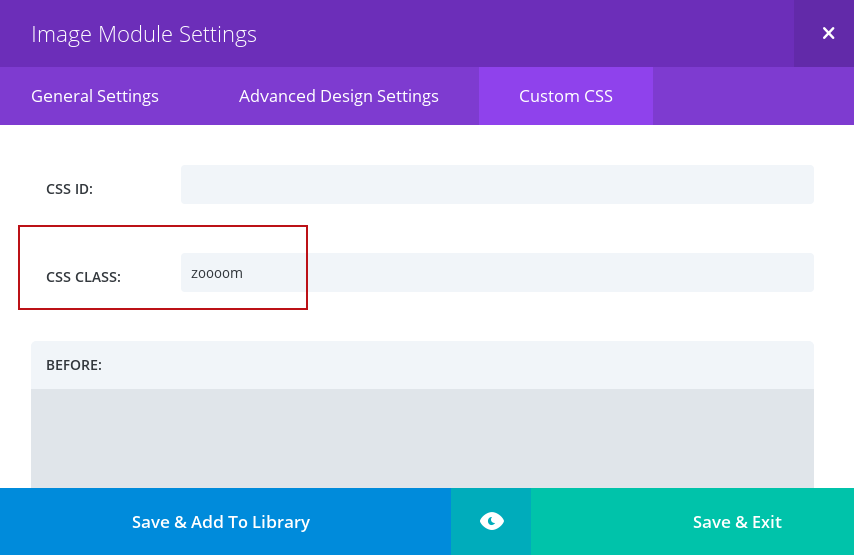
» Apply the zoom with Divi Builder
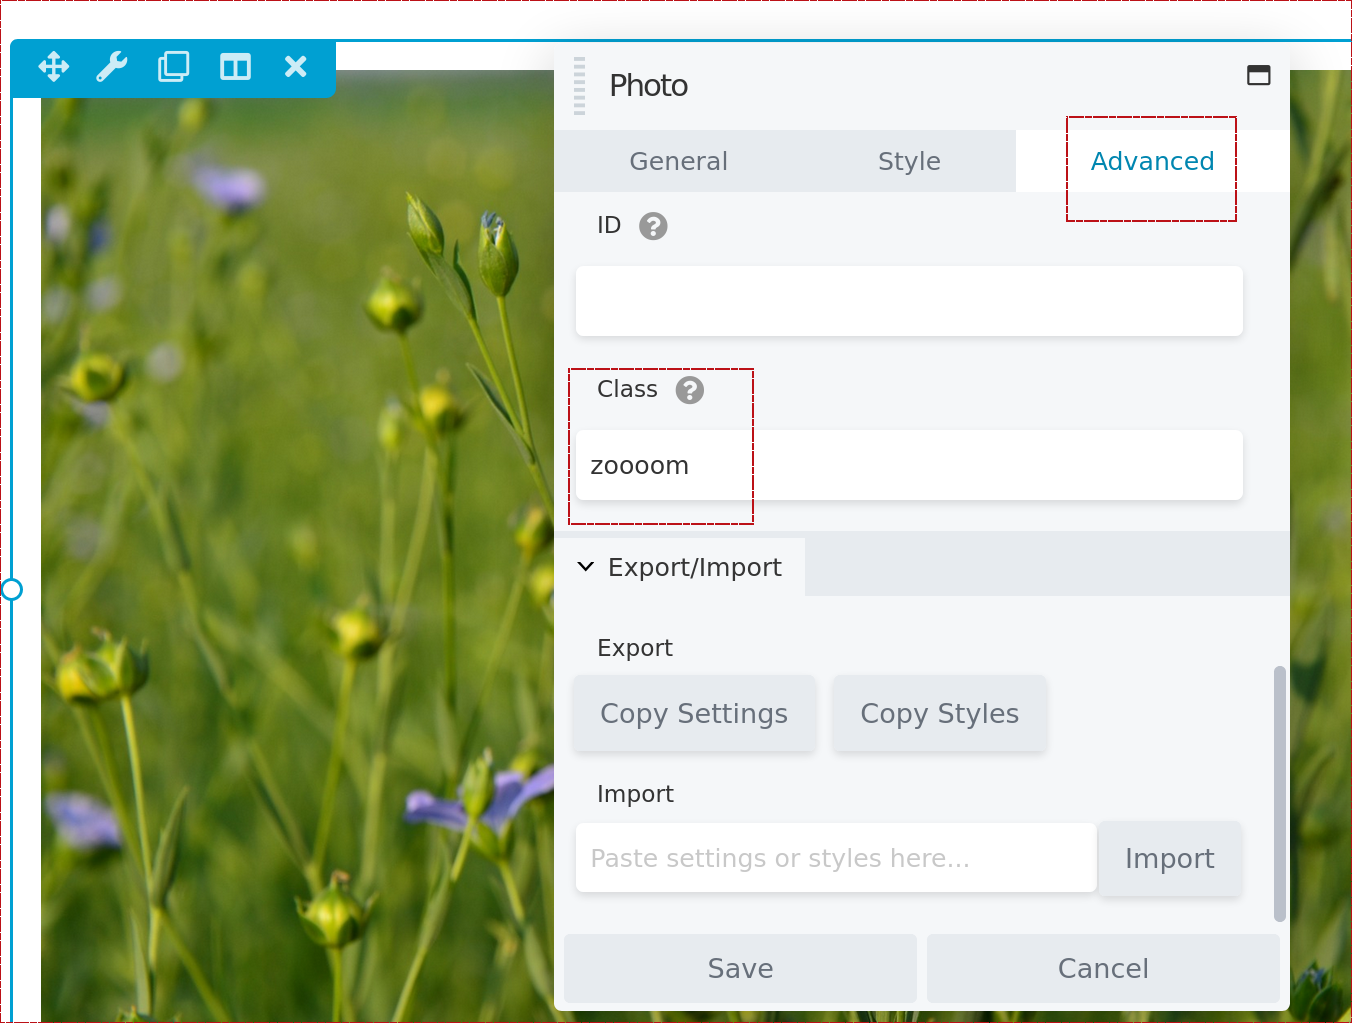
To apply the zoom on specific images or galleries you have to tag the image with the zoooom CSS class as shown in the following screenshot:
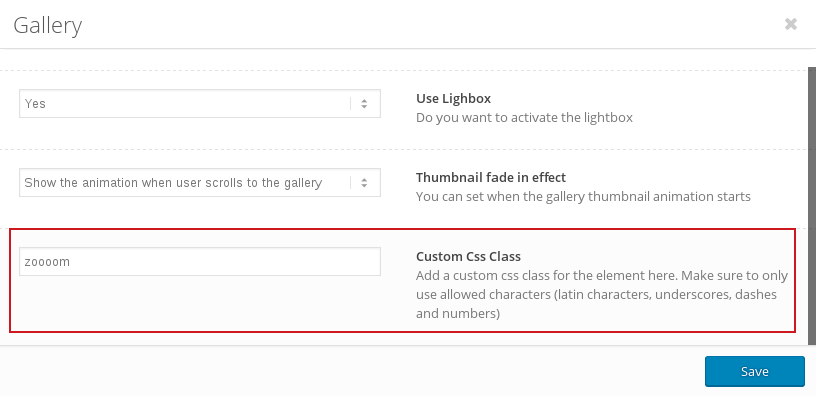
» Apply the zoom with Enfold Theme Builder
You need to tag the Enfold Theme Builder element with the zoooom CSS class as shown in the following screenshot:
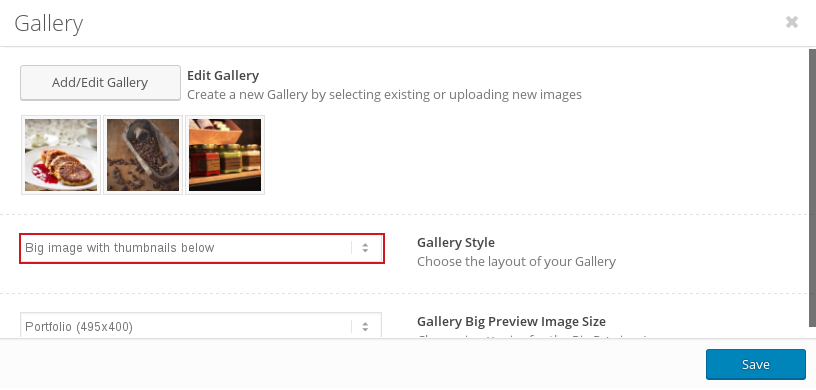
Note that for the “Gallery” element with the “Big image with thumbnails below” style the zoom will be applied automatically without tagging it. In the next screenshot you can see a “Gallery” element with “Big image with thumbnails below” style which you DO NOT need to tag with the zoooom CSS class:
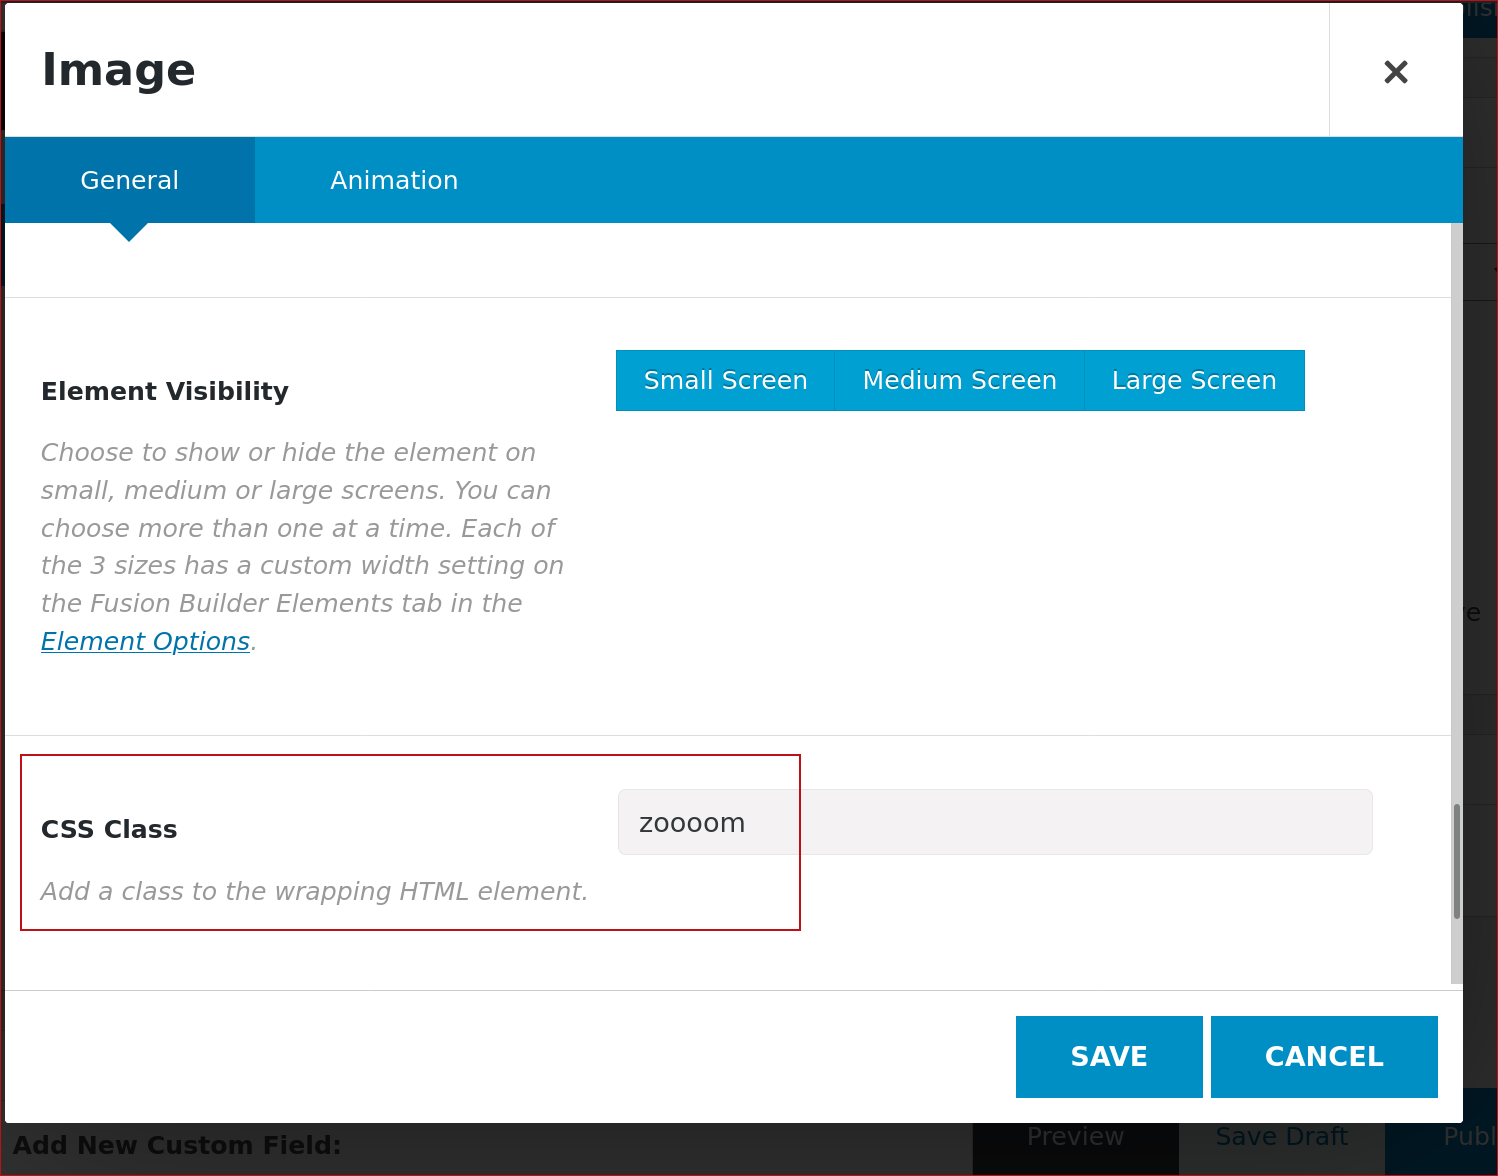
» Apply the zoom with Fusion Page Builder
To apply the zoom on specific images or galleries you have to tag the image with the zoooom CSS class as shown in the following screenshot:
» Apply the zoom with Brizy Page Builder
To apply the zoom on specific images or galleries you have to tag the image with the zoooom CSS class as shown in the following screenshot:
Apply the zoom on other elements
You can apply the zoom on different elements by writing the images’ CSS selector in the Apply zoom on this particular image(s) option under General Settings, as shown in the following screenshot:
For example, use the following CSS selectors to enable the zoom for:
- WordPress default gallery –
.gallery img - NextGEN Gallery
- on thumbnails and sliders –
.ngg-galleryoverview img, .ngg-slideshow-image-list img, .ngg-imagebrowser img - inside the lightbox – enable the “Enable inside the fancyBox lightbox” option under General Settings
- on thumbnails and sliders –
- Image Carousel from Avada Theme –
.fusion-carousel img - BigCommerce for WordPress –
.bc-product-gallery__imagesin the “Swiper Slider container class” option
Please note the dot in front of the code examples used to indicate a CSS class.
Troubleshooting
The mousewheel zoom doesn’t work right on Firefox.
There is a conflict between the plugin and Firelight Lightbox plugin. There isn’t anything we can do about it, you’ll have to choose between the mousewheel functionality and the Easy Fancybox plugin.
The zoom window is about 1cm lower than the zoomed image.
This is an effect caused by the WordPres Admin Bar. Try logging out and check the zoom again.
The “WP Image Zoom” button doesn’t show up in the Edit Post/Page editor.
Usually this is caused by an incompatibility with the Black Studio Tiny MCE Widget plugin or the SiteOrigin Widgets Bundle plugin. You can try temporarily to disable these plugins, apply the zoom, then enable back the plugins.
Another option is to check the “Apply zoom on this particular image(s)” option under the General Settings section.
The zoom is a bit blurry.
If you have the Jetpack plugin active, please deactivate the Photon module. The Photon module optimizes the images by presenting a smaller version, but the zoom plugin needs the bigger images in order to present a sharp zoom.

Another reason could be the Zoom Level, try setting it to default. Of course you can force the Zoom Level to 2.5, but this will make the image a bit blurry. This option is thought for web shops that already have hundreds of lot of products with small images and the images’ sharpness is not an issue.
The zoom is not showing up at all.
There can be different reasons behind this:
- If you have a caching plugin on the website, don’t forget to clear the caches after you apply the zoom or make changes on the configuration page.
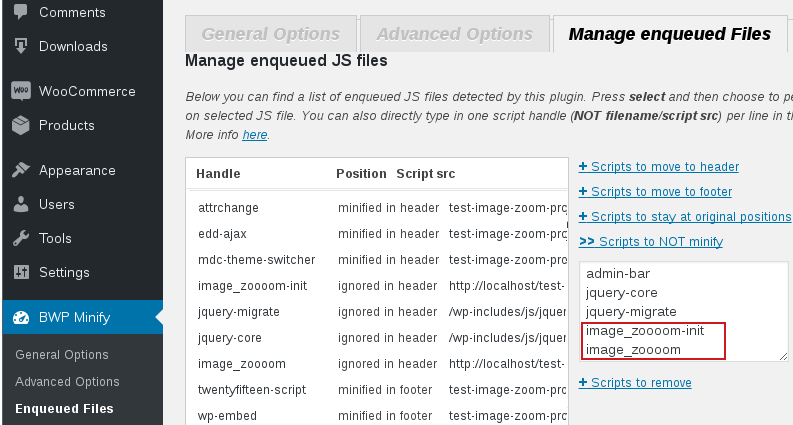
- If you have the BWP Minify plugin active, you need to add the “image_zoooom-init” and the “image_zoooom” to the “Scripts to NOT minify” option in the BWP Minify settings, as shown below:
- If you’re trying to enable the zoom on the WooCommerce products, keep in mind that many themes replace entirely the default WooCommerce gallery with a slider. For example, the Avada theme is replacing the default WooCommerce gallery with the Flexslider slider. In order to make it work on the Avada theme, you’d need to write
fusion-flexsliderin the “FlexSlider container class” option under the General Settings section. For other special cases please don’t hesitate to send us a link to your website in the contact page and we’ll gladly look into it.
There is an error while updating the plugin.
On WordPress websites hosted on Windows there is an “Could not create directory” error shown when trying to update the plugin. This is due to the fact that Window has a limitation of 260 characters for paths. Currently this is a bug in WordPress core itself and there is no estimated time of arrival for the fix. You can update the plugins manually (by uploading again the zip file), or, as a workaround, on Windows 10 there is a way to extend the 260 characters limitation. Another workaround is to use the Easy Theme and Plugin Updates plugin.
When trying to download the plugin from silkypress.com, I get a folder and not a .zip file
When downloading the plugin from silkypress.com, you definitely get a .zip file.
It could also be that your operating system or the browser is automatically extracting any downloaded zip file. (For example Safari will automatically extract zipped downloads if the Safari > Preferences > General > Open safe files after downloading option is enabled.)
You can also simply create a .zip file out of the folder created after the download and upload that .zip file to your WordPress website as a plugin. That will also work. The .zip file’s name is irrelevant.
I want to zoom on an image with transparent background, but, when zooming, I can see the original image behind the zooming lens.
Normally we would recommend to re-upload a non-transparent version of the image for the zoom. You can transform a transparent image to non-transparent by converting it to JPG format, or by opening the image in GIMP and selecting the “Remove Alpha Channel” option from the “Layer -> Transparency” menu.
But, if re-uploading a non-transparent version of the image is not an option, then you can fix this by adding the following CSS rule to your website:
.zoomContainer { background-color: white; }
and replace “white” with the color of your page’s background. You can use the “WP Admin -> Appearance -> Customize -> Additional CSS” page to add the CSS rule.